Tuesday, August 28, 2012

It's a fun word to say and keeps the kids busy

We are in our final days of summer for the Bacon kids.  School starts back up next week. I'm not sure what Bacon Bit will think of the empty and quiet house. I'm pretty sure he'll miss his playmates.  But since this is the last week before school starts, I think the kids have kicked up the 'I'm bored' a lot more.  It was time for a fun science experiment.  Thankfully it requires very little to wow the kids and it kept them busy for quite a while!  Digging though the pantry I found a box of cornstarch. I never really used this stuff in baking but for some reason there sat a box in my pantry.  Having remembered a recipe from when the kids were in  ECFE I decided to show them the fun of Ooblek. What you say? Surly you've heard of ooblek? No. Well learn along with us. The kids were just fascinated by the name of this stuff, but I told the to wait until they saw what it does!

First you need to start off with equal cornstarch and water.  And a big bowl to mix it up in.  Now if you want to make fun colors I suggest putting a drop of two of food coloring into the water before mixing.  Pour both water and cornstarch in the bowl and start mixing.  The goal is to mix it until it runs off the spoon easy. Clumpy like the green stuff here needs a little more water. Add small amounts until you get a runny consistency like the pink stuff below.


Now the fun part, go ahead, knock on it. Cool hun? It's hard.

Now rest your fingers just on the top of it and watch them magically sink in.

The kids were in awe!  They had a lot of fun. Bacon Jr. had fun getting it to stick to his hand and picking up the bowl.
Little Miss Bacon had fun watching it drip off her fingers.
Even Bacon bit had a bowl to play in. It was a great activity to do on one of those 'I'm bored' days.  Or rainy days or days you just want to be the cool mom!
And you can add a lid and save it for fun the next day too! I did find that it only lasts a few days though before it starts to smell and go bad but the kids can have fun while it lasts!

Monday, August 13, 2012

Birthday Busy

 It was that time of the year again, both Bacon Jr. and Little Boy Bacon's birthdays come 4 days apart from each other in July. That means a lot of cake at the Bacon house!  This year since we've been so busy I actually thought about buying their cake from the store bakery.  That was until I glanced at the prices, $19.99!! I about fell over right there. I promptly headed for the baking aisle instead.  Bacon Jr wanted a Lego star wars cake this year.  Gosh these kids keep me on my toes with ways to wow them with my very armature cake decorating skills!  But I try to not disappoint them.  I found an idea a while back how to copy characters right from a coloring book page with frosting onto cakes that I thought I'd give it a try for this challenge.  First find our character, Bacon Jr. wanted Jedi Luke for his cake. I quickly scanned a copy with my computer scanner and got started. If it was just from a coloring book I wouldn't have scanned it, I would have just used the page but we couldn't even find a free online color picture he liked so we choose one from his book.

 Next I whipped up some homemade frosting.  Then I grabbed a Ziploc type baggie and inserted my cake tip to the inside, snipped the bag and added the other tip pieces and viola! instant disposable cake decorating baggie.  These work great for small amounts of frosting. Trust me I've tried it to decorate sugar cookies with lots of frosting and all I got was busted bag seems!  Ahh... it's the little tips that save others headache!
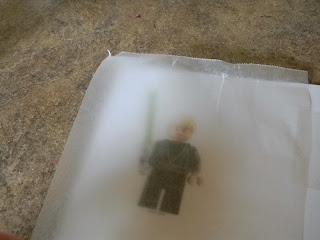
  Then take some wax paper and place it over your color sheet.  I taped mine to the sheet to make sure it wouldn't move as I frosted it.
Then I took one color and outlined the picture. It's a good tip to remember when you are doing this that the frosting you put on first will be the top layer of the design when you lay it on the cake. Also this will be a mirror image when it's on the cake if you're ok with that!

 Then take a new color and add that to the picture.  I filled in the body with black, mixed up some peach for the face and hand, yellow for the hair and a nice green light saber.  Normally after I outline I would have made sure to put the face on before filling in over the top, however I was working with a picture that was only 3.5 inches in size. I do not recommend this!  It was very hard to do, but that was the size I needed for the cake. The bigger the picture, the easier it is to make the fine details on it. 
   Now that my Luke was complete it was time for him to 'chill out' in the freezer for a while. I left it in there for about an hour just because I was busy decoration the house. I'm sure 15 minutes would have been enough. 
While it's in the freezer it's a great time to frost the cake too!
 Now it's time to take out your frozen character. You can lift off the wax paper and tada! Magic right?

 Gently flip your frosting image over and place it on your cake where you'd like it. Then gently peel the wax paper away. 

 There you have it! A very happy birthday boy! I finished making the face by using edible pens. Ok so the pen isn't edible but the 'ink' is. YUMMY and FUN!


 And no I didn't forget about Little Boy Jr.'s birthday cake either, his was a bit less complicated.  All he wanted was a bobber cake!  He loves fish and fishing even more.  I took two 1 quart bowls and baked my cake in there, bake a small ramekin too and assemble and frost! He loved his special cake too!
 Now what is the best way to end the perfect birthday when your a kid? With a campfire you got to help build of course! Complete with blue and green flames thanks to Grandma Bacon!  Whew, it's over and I was an exhausted mama, but I had two very happy boys and two awesome birthday cakes for very little money!