Showing posts with label burger. Show all posts

Friday, October 28, 2011

"Yesterday's Meatloaf is today's Sloppy Joes"

Anyone remember those lyrics?  If not that's probably a good thing!  Mr. Bacon and I were taking a walk down memory lane listening to old songs we remembered on YouTube the other day.  Some he was even letting the kids listen to.  I found out that they actually do appreciate some big hair bands as well as a little Lunch Lady Land!  Mostly they just laughed at the video.  Anyway, I'm thankful to say this meatloaf will not become tomorrow's sloppy joes!  It's way too good (even as leftovers) to eat it any other way.

Last year I was looking for a good meatloaf recipe.  Meatloaf is a comfort food and is there anything better than comfort food?  It warms you up and makes you feel all cozy inside.  My friend Nancy was happy to share hers.  She said her boys would eat a whole pan at a time it was that good.  So I thought if her kids at it, surely mine would too right?  Yes indeed I was right.  Want to try it out too? Read on!


Nancy's Meatloaf:
1.5 lbs burger (beef or turkey or a mix works fine I've found)
12 saltine crackers- crushed
3/4 cup milk
1 egg beaten
1 tsp onion powder
1 tsp salt
1 tsp garlic powder
1 TBSP Worcester sauce
1/4 tsp each- pepper, dry mustard, sage, celery salt, garlic salt
Ketchup to top

In a bowl or 1 cup measure cup, place milk, Worcester sauce and egg. Mix well.  In a large bowl place the burger, crackers, and seasonings.  Now if you don't have all the seasoning on hand, it's ok.  I for some reason didn't have everything either.  I did have pepper and sage.  I added 1/4 tsp more garlic powder instead of garlic salt, and I added roughly 1 tsp yellow mustard from the fridge since I couldn't find my dry mustard.  And don't ask me where the celery salt went either?  Seems like the pantry monster has been hungry around here lately, or maybe playing tricks on my by hiding my spices?
Next comes the messy part, Mixing.  Dump the milk mix into the meat and spices and mix away. I do this with my hands, it's the best way I've found to make sure everything gets mixed well.  If you choose to use a spoon that's fine too. Just make sure it's mixed up really well.  Next take out a 9x13 pan and grease it well.

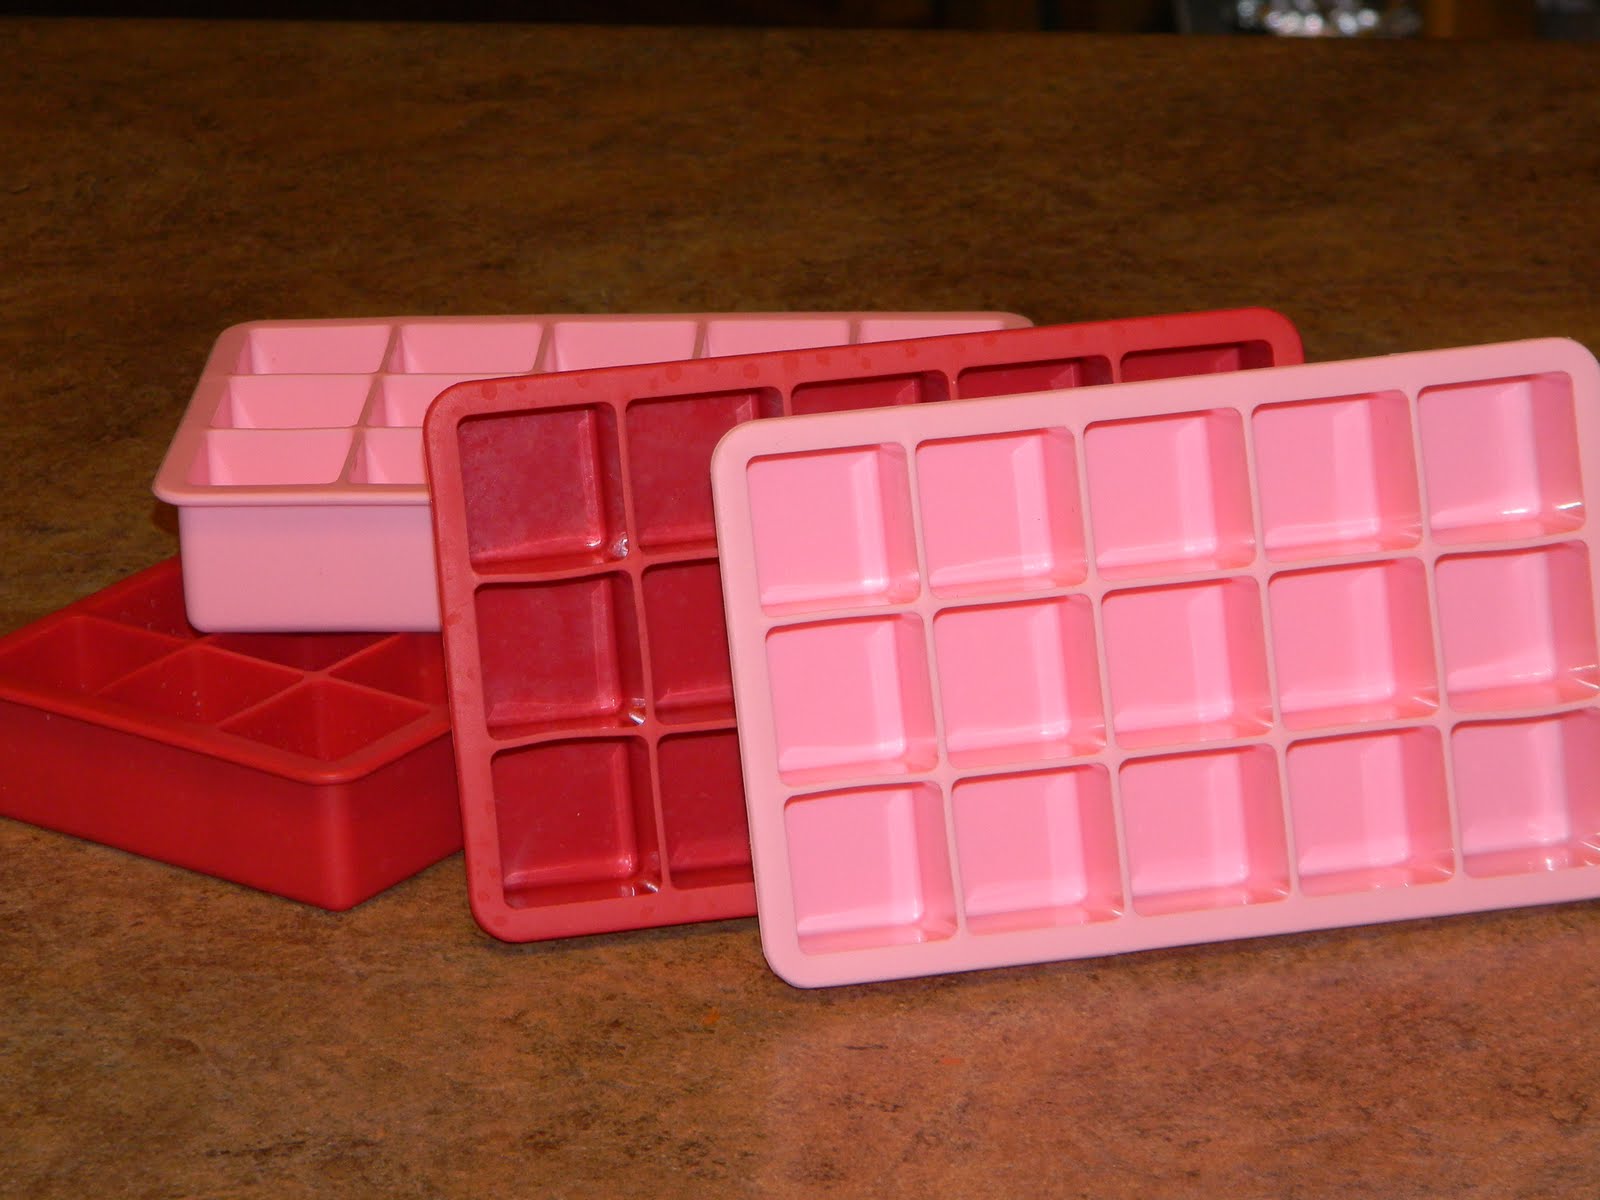
Spread your meat mixture in the pan and shape it into a loaf.  You can also grease muffin tins and fill them with the meat mix and have mini meat loafs too. The kids love that. My friend Nancy uses a special silicone heart pan she bought for a special, always requested valentines meatloaf dinner.  Hey have fun with it, the more creative, the more kids like it right?!
Once you have your loaf, squirt ketchup over the top of it.  Place it in a preheated 350* 
oven and let it bake for 1.5 hours. 
Here is mine all snug in the oven!  We had baked potatoes and squash with it as you can see. 
Nothing like all the mess in the oven baking while I play with the kids!
How can you say no to a slice of meatloaf?  This recipe is amazing and always comes out moist.  Thank you Nancy for sharing your recipe with me! It's a family favorite here.

Monday, January 10, 2011

Hot BUNS!


Want to know one of my food downfalls? BREAD! Hot, fresh from the bakery, all nice and fluffy and soft bread. I think I could eat a whole loaf of fresh bread to myself. But who has a bakery right next door to them?! (OK I'm sure someone does, but really who wants to pay bakery prices?) Making bread really seems like a hard, long process. It's making you sweat just thinking about making it right? I know what you are thinking, oh but it's only a few dollars at the store, I'll just pick some up. But there is nothing that compares to the smell of fresh baked bread from your oven in your home that YOU made! It's really not that hard to do, and it will save you some money. Especially if you have one of these fancy mixers. I LOVE my kitchenaid mixer. I've had it for two years now and I don't know how I ever lived without it! It's so much a staple in my kitchen that I believe it needs it's own name. Any suggestions? You don't need to have a mixer to make these biscuits. You can just use a bowl and spoon for mixing and your own hands for kneading the dough, it will just be a bit more work, but still worth it in the end I promise!

Tonight's dinner plan was Cheeseburger mac. No not the kind that comes from the box with a red & white glove on it, no "Helper" for my hamburger in this house! Mine comes from scratch and tastes a whole lot better! More on that later. I wanted some biscuits to go with dinner tonight. Not just any biscuits, but warm, fresh from the oven dinner rolls. I used to buy frozen dinner rolls that you had to take out of the freezer and let rise all day before baking, then I thought to myself... "Ma Bacon, you don't need to pay for overpriced biscuits, make them yourself!" And so I did. I found this recipe for the most delicious dinner rolls on one of my favorite recipe sites a while ago and finally decided to dig it out and try it.

Sweet Dinner Rolls
1/2 cup warm water ( about 110*)
1/2 cup warm milk (about 110*)
1/3 cup sugar
1 - .25 packet yeast or 2.5 tsp yeast

* Place water and milk in mixer bowl add sugar to dissolve. Add in yeast and stir just a bit. Let this sit for 5-10 min. This is called proofing the yeast. Your yeast should get nice and bubbly.

Add in:

1 slightly beaten egg
1 tsp salt
1/3 cup softened butter or margarine

Mix.

3 3/4 cups flour

SLOWLY (unless you like a flour storm in your kitchen!) add in the flour. Your dough should start to form a ball. If it seems sticky yet, add in more flour. If it seems too dry and won't form a dough ball, add more water. Once you have a nice dough ball, let it kneed for 5 or so minutes in the mixer. See I love my mixer... it does all the hard work for me!

Take the dough ball out of the mixer and place it in a WELL GREASED bowl (spray it with cooking spray). Put it in the bowl, and then flip it over so the top of the dough ball gets some of the grease on it too. Take out some plastic wrap and spray that with cooking spray as well. Place spray side down over bowl.


Place the bowl some place warm, ideally I like to place it in a nice sunny window. Currently in Minnesota we don't get to many of those days. On non-sunny days or if placing it in a window due to lurking pets or curious toddlers is not an option, you can place it in a warm oven to rise. First start your oven to 200*. Once the oven is pre-heated to that, TURN IT OFF and place your covered bowl in the oven. make sure the racks are not to close to the top, you want room for your dough to rise. Don't worry, the plastic wrap won't burn or melt in the oven as long as it's turned off. Let the dough rise for 45 minutes to 1 hour. This is a great time to kick back with a nice drink, a good book and relax! After all, making bread is hard work and you need to pamper yourself (or at least that is what you can tell people who are amazed that you bake your own bread!) Once the dough ball has doubled in size, take it out. Turn your oven back on to 200* to pre-heat again.

Take the plastic wrap off carefully and save it, I'll tell you why in a minute. Clear off a work surface for your dough. I use my built in cutting board for this step. I FINALLY found a good reason to use this cutting board. Honestly I tend to forget about it for chopping other foods for some reason. Place some flour on the work area, you don't need much no more than 1/4 cup. I have way too much on my board here. Take your fist and punch it in the middle of your nicely risen dough. I know seems mean right! Here you have this beautiful dough ball, and you need to destroy it. Trust me, it's all worth it in the end!

Kneed the dough in a little flour, not too much. Kneading is just a fancy word for making a dough ball again. Little miss Bacon and Little boy Bacon do this all the time with their play doh! Once you have a dough ball, now the 'work' begins. Decide what type of biscuits you want. You can just have nice round biscuits by creating lots of smaller dough balls. Take your dough and cut it into 12 biscuits. Roll them into balls again and place them on greased pans or a 9x13 baking dish so the ends just touch. Make sure to leave room for them to expand again. You can even get fancy and roll the dough out into big circle, cut into wedges like a pizza and then roll them into crescent rolls if you'd like

Today I decided I wanted to make pull apart biscuits. The kids love that they can tear their bun on their own and butter it. I cut my dough in half. Then each half I cut into twelve pieces. Each of those twelve pieces I cut in half again- so total I have 24 little pieces. I rolled those into balls and place 2 of each in well greased muffin pans. Then I repeated with the other half of the dough.

It seems like a lot of work. Really it's not, just stepping out of your comfort zone. It took me only 15 minutes from the time the dough came out of the oven as a big dough ball to getting them ready to go back in the oven again. Cover the pans with the spray covered plastic wrap you saved from earlier. Now they are ready to sit in the oven again. TURN OFF YOUR OVEN AGAIN! :) And place the pans in there to rest for another 30 mins. Go back to that book you were reading and pick up where you left off! Ok so I can dream right. If I didn't have 4 kids that needed me to go in 4 different directions all at once, I'd love to pick up a book and get lost in it while I have bread rising in my oven.

After about 30 minutes, or when the biscuits have doubled in size, take the plastic wrap off the pans. Turn the oven on to 350* and bake for 16-18 minutes or until the biscuit tops are golden brown. Take out and cool on wire racks. I brush the tops of my buns with some butter right when they come out of the oven. Makes them even yummier!

How can you say no to one of these?! Delicious. They taste and look like you slaved away in the kitchen all day long! (and you did, how far did you get into that book?!)


They went perfect with my cheeseburger mac.

Cheeseburger Mac:
1 lb ground beef
1/2 med. onion- chopped
2 cloves garlic chopped
1 can cheddar cheese soup
1 can cream of chicken soup
2/3 cup milk
1/4 tsp salt
1/4 tsp pepper
2 cups cooked elbow noodles
1 cup shredded cheddar cheese
1/2 breadcrumbs- optional

In skillet brown burger with onions and garlic. In mixing bowl combine soups, milk, seasoning and half the cheese. Add in cooked noodles and burger. Mix well. Place in greased 9x13 pan. Sprinkle breadcrumbs on top. Bake in 350* oven for 45min. During last 5 min add remaining cheese to top and let melt.

It was an amazing dinner for a cold winter day!

I want to say "Thanks" to all my readers. Please keep coming back and checking on the Bacon house. I have some big things in store that involve these:


Please feel free to leave a comment or just say Hi! I'm still looking for the perfect name for my mixer... any suggestions?

Saturday, December 11, 2010

Copycat Nachos?

Last week we stocked the cupboards and fridge full and it was a good thing because this weekend they are predicting 1 to 2 FEET of snow for our area! Right now I'm sipping some coffee, watching the snow fall outside and listening to the kids playing quietly (for once) down stairs while muffins are baking in the oven for breakfast. It's a good start to the day so far! I wanted to post about my budget from our last shopping trip but for one, I can't seem to find where I put the receipt, and I'm pretty sure we went over our grocery limit! One good thing from it is I think we can make it until after Christmas to get groceries again, which would be another 3 weeks between trips. I'm liking being able to go 3 weeks between having to trudge out in the cold weather with the family.

Since I can't talk about what I spent the bacon on, I'll post what our plans are for all that food. One thing we do is meal plan. We usually sit down as a family and discuss what we want for meals. The kids get a say in what we make which helps with what they actually eat at dinner time. Also they get excited about their special meal day where they get to help Mr. Bacon or me make it. It's a win for us! This time we figured with the holiday we needed 14 meals. So what's on our list for the next few weeks?

  1. Grilled Chicken with fried mushrooms, wild rice & mixed veggies
  2. Bacon wrapped pork loin, roasted potatoes, & corn
  3. Chicken and rice, & broccoli
  4. Pizza
  5. Tinfoil meal
  6. Goulash & toast
  7. meatballs & gravy, mashed potatoes and beans
  8. Venison stir fry
  9. Mini burgers, homemade fries & apple slices
  10. spaghetti & garlic bread
  11. country pork chops- this is a one dish meal- pork chops, potatoes & carrots
  12. Tacos
  13. egg Scramble & toast
  14. Beef stroganoff & homemade biscuits
So you can see nothing too fancy or that takes a lot of time, but some pretty darn good tasting meals! They are also in no particular order. We just list the meals we have everything on hand to make and then pick each day from the list. Can you guess which one's the kids choose to make? Little miss Bacon loves spaghetti (ok so she likes the garlic bread, but she always chooses this dinner!) and she gets to help make the garlic bread with me. Little boy Bacon loves scramble and helping Mr. Bacon make it. It's also a meal that is easy on our budget. And Bacon Jr. loves tacos. He helps with chopping the veggies.

We made the tacos already this week. One thing I really wanted was Nachos. There's a little restaurant in town that has nachos on their appetizers and they are really good! I fought the urge to go there and get some. So I decided to make my own at home while the others had tacos, complete with my homemade salsa.


No too bad, and a bit festive with the red & green tortilla chips I bought! They were not quite like the restaurant nachos, but they saved me $8 (Really it saved me more like $40 and two wasted kids meals that we would have ordered and only had 4 fries eaten from them if the whole family would have gone out to eat) I'll happily pocket my $40 for the home made nachos and I'll keep working on making them more like the one's I love to go out for. So here's a challenge, what can you try to make at home instead of going out for? Or how about trying to meal plan to save some bacon for your pocket, especially during this crazy time of year.

Thursday, July 29, 2010

Portion size and fillers

Do you know what a portion size looks like? It's really not that much. One thing that will eat at your food budget is just how much a family member eats. I have found an interesting thing when it comes to how much of something my kids will eat. One morning I bake them muffins for breakfast. I used regular sized muffins, one batch made up 12 muffins. Each of my kids at TWO whole muffins. I was shocked.

A week later I made muffins again (yes they are a favorite for breakfast around our house, but yummy and homemade!) This time I thought it would be fun to make the mini-muffins which makes 24 little muffins. To my surprise my none of my kids had more than 3 muffins each. So that got me thinking, does it have to do with size? I was thinking 2 regular sized muffins is a bit much for kids to eat. I repeated my theory a few times since my first discovery and each time they ate less of the mini muffins than regular ones.

So what have I learned? By changing the size of the muffins my kids ate less (probably more to their correct portion size) and my muffins lasted twice at long! Which means added bacon in my pocket!

We've used this on other foods as well. One is ground burger. When I make meals that involve meatballs, like the tinfoil meal we had this past week, I make tiny meatballs. I use one pound of burger and get about 25 mini meatballs out of it. The kids eat only 3-4 each, again closer to their portion size, and I feed our family of 5 their protein on only 1 pound of burger for our meal, another budget saver! If you are wondering what a portion of meat is, it's about the size of the palm of your hand- or your kids hand.

Fillers are another way to make your food budget go further. Along with our pound of burger in our tinfoil meal above, I cut up potatos and carrots to have with it. These are both fairly cheap and makes an easy meal. Another filler I use to make our meals stretch further is noodles. We stock up on them when they are cheap or on our trips to SAM's club. By adding a few extra noodles to our meals we can make sure everyone get's plenty to eat and we have leftovers to lunch the next day.

I'll include the recipes I've mentioned above for you to try them out. Great recipes for a healthy budget!


Apple pie muffins:

Ingredients

2 1/4 cups all-purpose flour
1 teaspoon baking soda
1/2 teaspoon salt
1 teaspoon cinnamon
1/2 teaspoon nutmeg
1 egg
1 cup buttermilk
1/2 cup butter, melted
1 teaspoon vanilla extract
3/4 cups packed brown sugar
3/4 cups sugar
2 cups diced apples
I like to use more than one kind of apples if I have them, 
one kind is still yummy though 
 
 
Topping:
1/2 cup packed brown sugar
1/3 cup all-purpose flour
1 teaspoon ground cinnamon
2 tablespoons butter, melted

    1. Preheat the oven to 375 degrees F (190 degrees C). Grease a 2-12 cup muffin tin pans or 2-24 cup mini muffin tin pans or line with paper muffin cups.
    2. In a large bowl, mix together the egg, buttermilk, 1/2 cup melted butter, vanilla, sugar and brown sugar until sugar has dissolved. Pour into the flour, baking soda, salt, cinnamon, and nutmeg. Sprinkle the diced apple into the bowl as well. Stir just until everything is blended (make sure not to over mix this, it's ok to have lumps). Spoon into the prepared muffin tin, filling the cups to the top.
    3. In a small bowl, stir together 1/2 cup of brown sugar, 1/3 cup flour and cinnamon. Drizzle in 2 tablespoons of melted butter while tossing with a fork until well blended. Sprinkle this over the tops of the muffins.
    4. Bake for 25-30 minutes for regular muffins or 12-16 min for mini- muffins in the preheated oven, or until the tops of the muffins spring back when lightly pressed.


    Goulash

    1 lb ground burger
    1 tsp onion powder
    2 tsp chili powder - divided
    2 cans (29oz) tomato sauce
    3 cups (uncooked) elbow noodles

    Boil noodles in water until cooked.
    In large skillet, Brown burger with onion powder and 1 tsp chili powder. Once browned, add in remaining tsp chili powder and 2 cans tomato sauce. Let simmer 5 min. Add in cooked noodles to burger and mix. Let simmer, stirring occasionally for another 10 min until all is heated though. Serve.

    We like to serve this with toast. It's a great meal, especially on winter nights. This usually gives us enough leftovers for lunch for everyone the next day. If you have a smaller family or prefer less noodles, you can decrease this to 2 cups noodles.

    Enjoy!