 Yes I did it, just as I mentioned I would. I tried my hand at homemade yogurt. Oh the lessons I've learned! I did a lot of research on the topic, and it seems there's a lot of good advice out there about it, just not all on one page. So hopefully I can help with some of that here and make it easier for you.
We go though buckets of yogurt at our house a week, everyone loves it. But the cost for it keeps going up and I recently acquired a lot of milk so I decided to try it. To be completely honest, its REALLY simple. But you are thinking, is it really that big of a savings? Normally when we shop we buy 4 quarts of yogurt every two weeks (like I said we go though buckets!) At $1.96 a quart, that's $15.86 a month just on yogurt. I can buy a gallon of milk for $2.39 right now and it makes 4 quarts, or $.60 a quart (or $4.80 a month for 8 quarts). That's about the price most pay for a single 6oz serving cup of yogurt. So there is a big savings here. Also I love knowing exactly what is going into my family's food, homemade tastes better and we reduce the amount of garbage we throw out and recycle each week by making our own.
Well here it is, Ma Bacon's adventure into homemade yogurt.
First you need some equipment.
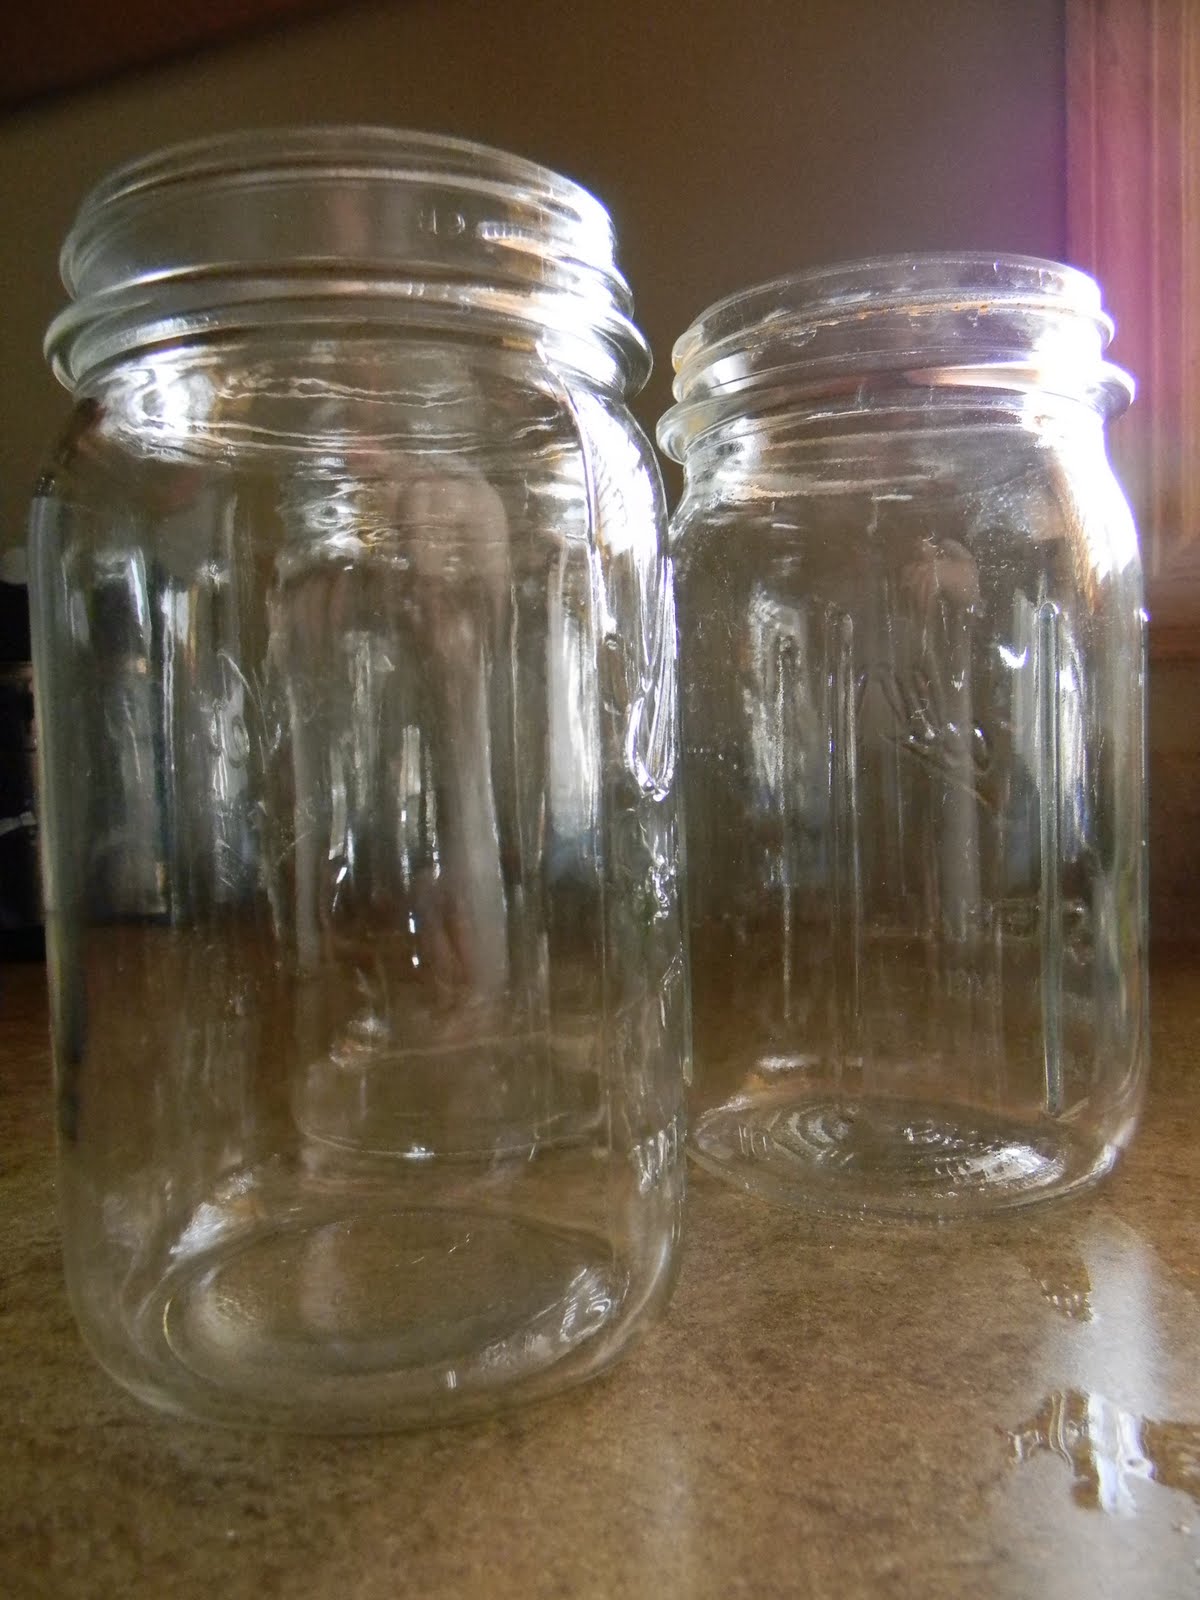

*glass quart size jars with lids and rims- I found quart canning jars great for this.
*Milk- any kind from skim to whole. My research has told me not to use milk with UHT (ultra high temperature pasteurization) As for the amount, that is up to you, this is another thing I like about homemade yogurt, you can make as little or as much as you like. The same amount of milk you use, is how much yogurt you will make.
*Thermometer
*Cooler big that will fit your quart jars
*One 6-8oz good yogurt for starter - I'll explain more later.
Now that you've found everything, it's time to get started.
First we want to sterilize our jars and lids. You can do this by placing them in a large stock pot and placing about an inch of water in the bottom. Bring the water to a boil and let the pot boil for 10 minutes. Remove the pot from the burner. If you don't need to use this pot to heat your yogurt, you can just leave the jars in there until you need them. If you don't have a large pot, you can run the jars, lids and rings though a hot cycle on your dishwasher.

Now that your jars are clean, lets get started on making that yogurt. Take your milk and pour it into a large pot. The first time I used a gallon of skim milk. I have to say I was a bit nervous to use the fat free milk and worrying about how it would set up. Most sites I found say to use whole milk, however there are those who commented that said their skim milk worked fine. So I decided to give it a shot since it's what I had at home.


Start to warm your milk, I started to heat mine around medium heat or a '6' on my stove. I stirred it often while it warmed with a whisk. You want to heat it slowly to 190*. This is scalding the milk, you don't want to boil it though so make sure you keep an eye on it. This was not an easy job to do a half hour before lunch time at our house, next time I'll make it when the kids are occupied better! Once you reach 190* turn down the heat on the stove. You want to maintain cooking the 190* milk for about 10 minutes. After 10 minutes, it's time to cool the milk back down.


Once we have the milk cooled to 120*, it's time to add the starter yogurt. Now lets talk about that stater yogurt. There is a lot of talk about it when I did my research. Most of it points to the same direction, don't skim the pennies here. All the websites I went to said that you should spend the extra money and get a good quality name brand yogurt for your starter. There either hasn't been much luck with store brands or people just haven't tried it in fear their yogurt won't turn out. I decided I'd go with the flow on this one and bought some better yogurt. You want a higher fat if possible plain or vanilla yogurt with LIVE ACTIVE CULTURES. This is what is going to turn your milk into yogurt.
I used 6 ounces of yogurt to my one gallon of milk. Dump it in and mix it around thoroughly. This is important, you want all the starter yogurt to spread well though the milk. The active cultures needs to mix with the milk to make the yogurt. Once you have made a successful batch of homemade yogurt, you can use that as your starter. Take 6oz out right away, place it in a container and toss it in the freezer. This way you will make sure you have enough to start a new batch. You can do this for a few batches of yogurt. I've read over time that it will lose some of it's potency, and you will have to buy a new starter, but this should make 4-6 more batches before having to buy another little 6oz container.


Now if you want vanilla yogurt, you want to add your ingredients to this step. I made vanilla yogurt since I started with a vanilla starter and the kids really like vanilla. Once my starter was mixed in I add 3/4 cup sugar and 1 TBSP vanilla extract to the milk. You can adjust it to your taste here. Next time I make it I'll stick to the 3/4 cup sugar, but I think I'll increase the vanilla to 1.5-2 TBSP.


Once everything is mixed to how you want it, It's time to put it in the jars. I strain mine just to make sure there are no chunks in it. I placed a wire strainer over the top of my jars and poured. Oh the pouring, here's another tip I used, I poured my milk from the pot into a large measuring cup. This makes it SO much easier to pour into the jars then and less spilling all over the place. For some reason I had a lot of extra liquid left over, I'm not sure how 4 quarts of milk make over 4 quarts of yogurt. I didn't add in that much extra, but I had enough that I could probably fill up a pint jar or so.
Once you've filled up your jars, you might want to skim off the bubbles. This isn't necessary, but helps with the yogurt's texture. I just took a spoon and scooped them off. See, no more bubbles!


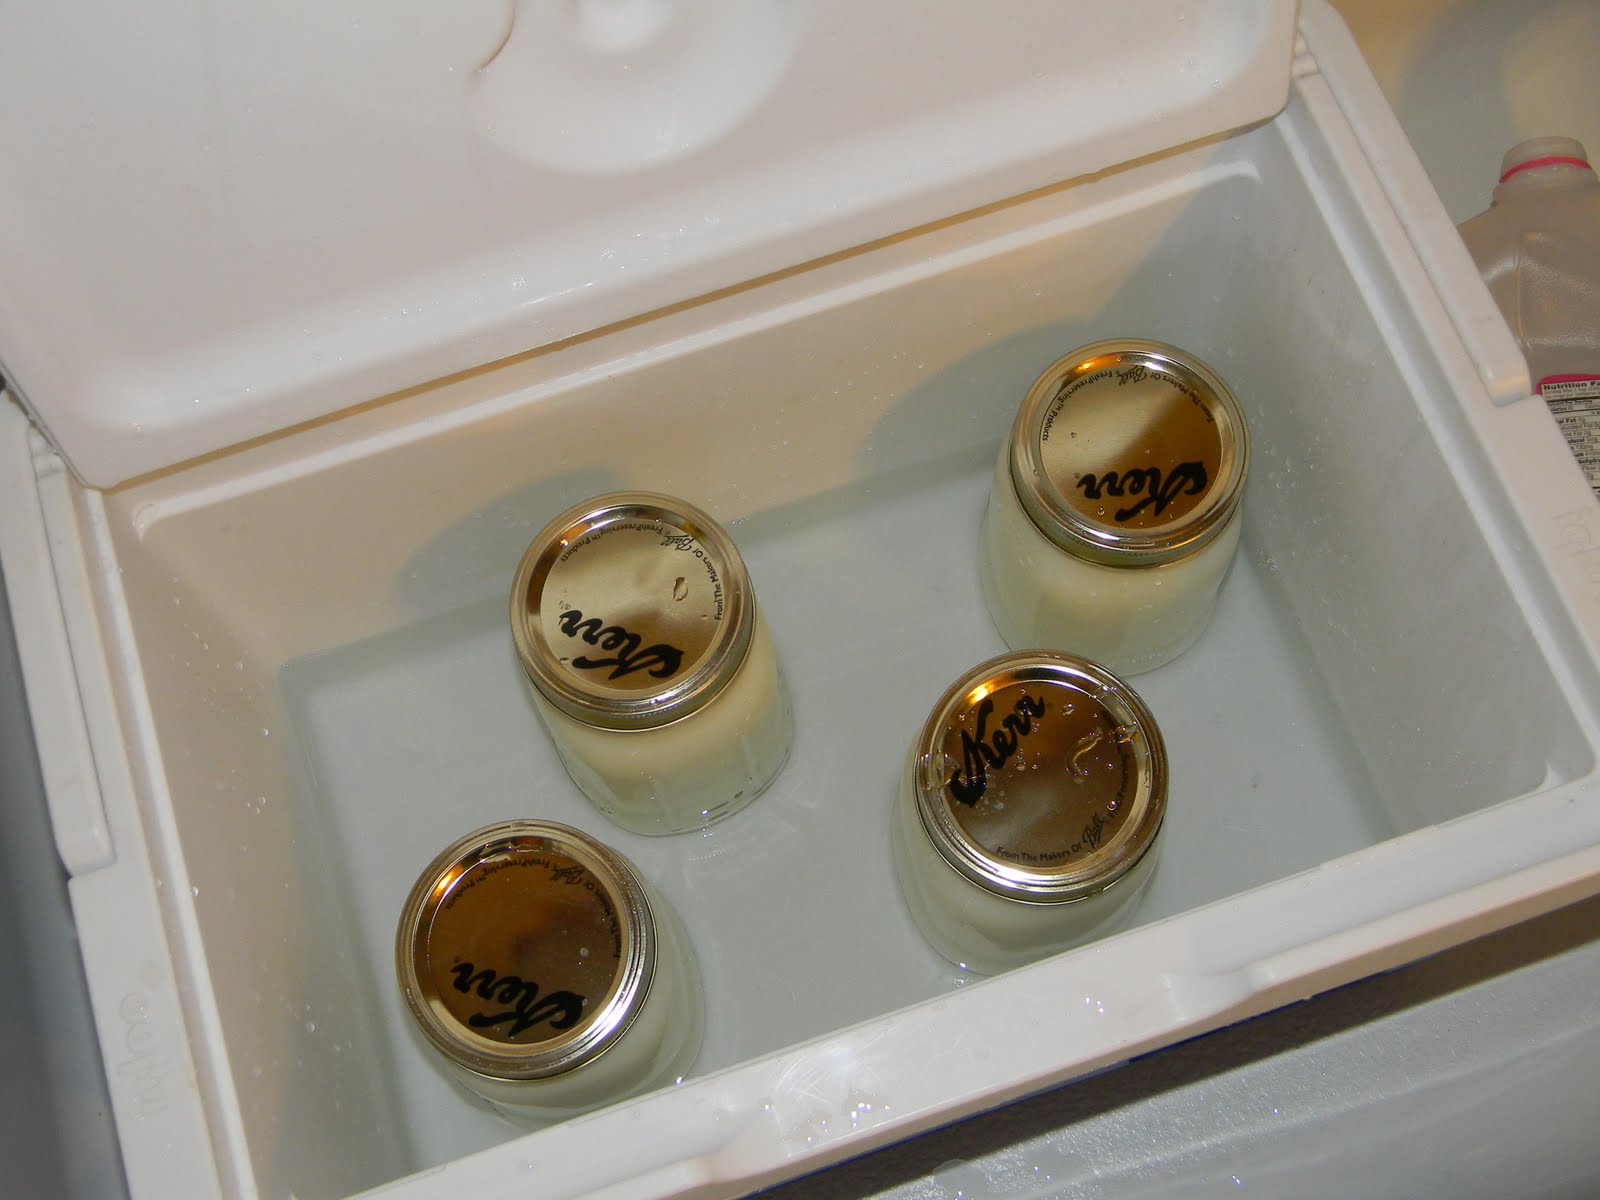
Place the lids and rings on them and they are ready to incubate. This is where your cooler comes into play. I took my cooler and pre-warmed it first, especially since it was sitting out in our cold garage. I place it in the bath tub and filled it with hot water while I made the yogurt. Before I placed my jars in it I dumped the water out so I started with a warm cooler. Place the jars in there and now add more water. This water should be about 120*. Our water from our tap comes out a lot hotter than 120* I found out. Turning it down will be something for the honey-do list. I added one gallon of 120* water to the cooler, next time I'll add 2 gallons to make sure the jars are covered better. You want water to be about to the bottom of the jar lids. Close the cooler and let it sit for 4 hours. (wall froggies not necessary!) I left my cooler right in the bath tub, it was one place I didn't think the kids would bother it. Also it made dumping the water out later a lot easier. Where you leave the cooler doesn't matter so much as long as it's a draft free place. So don't place it next to an open window or cold door.

After the four hours is up, it's time to move your yogurt. The exact time it needs to incubate in the cooler is a guess. I've read anywhere from 3- 10 hours are needed. Most say about 4 hours. I have read too the longer it sits the thicker it will get, but also the more tangy tasting it will be. This isn't an exact science, and I think next time I'll play around with the time I leave it in there.
Now this is where I made some mistakes (yup, I'm not perfect!) I decided to take one of my jars and test it out. I pulled it out of the water and tipped it a bit to see how thick it was. It wasn't quite as runny as milk, but not as think as store bought yogurt, somewhere in between. I even opened one jar up and mixed it around to see what happened during it's 4 hours in hiding. One note on the jars I didn't touch, the lids sealed down like what happens during a canning process. Just because they are sealed does not make them self stable. But this will make them last longer in the fridge so it's best to not open all of them up! Opened jars of yogurt will last for 1-2 weeks in the fridge, unopened can last up to 4 weeks!

They look so pretty don't they?!
The yogurt looked kinda 'sludgy'. What a fun word huh?! Everything I read said it will firm up more in the fridge so that's what I did. I put the top back on the first jar and placed all of them in the fridge. I put mine to the back where i know it's the coldest. The other jars I left untouched, I didn't even shake them like a present waiting for Christmas morning.


The next day I re-opened my tester jar. The yogurt was thicker but not store bought thick. I was expecting this since all the research said homemade yogurt would be a bit thinner since there are not as many additives. Also this is expected to be thinner with low fat milk vs. whole milk. None the less, it still tasted delicious. There was also a layer of liquid on the top. Don't worry this is normal, it's whey from the yogurt separating. You can either pour it off or mix it back in. We just mix it in, just like when it happens to our store bought yogurt. Another thing you can do if your yogurt is too runny is strain it. You can line a drainer with cheesecloth or a coffee filter and place your yogurt in it. Let the whey drain off. The longer you let it drain, the thicker the yogurt. This will become the consistency of greek yogurt.
We ate up that jar within 2 days it was that good. Now if you're not much for a plain or vanilla yogurt eater, no problem. The boys liked theirs with some strawberry jam mixed in, I like mine with some honey or maple syrup, or tossing in a handful or raisins and dried cranberries. I found mashing a banana and mixing it to be wonderful too! The possibilities are endless.

Since we finished the first jar so fast, we cracked open a second. And to my delightful surprise, it was creamy and thick! Just like store bought yogurt. So the lesson learned, don't play around with the yogurt! Take them right from the cooler of water and place them in the fridge untouched and unopened. This will help create a thicker yogurt. Mine now looks like the low fat yogurt you buy at the store.


So there you have it, homemade yogurt. Saves money, tastes yummy, and it's so good for you. I'm going to keep making it and hoping to perfect the recipe. I'll keep sharing my findings so you can make it at home too!
I have updated my process after my first attempt. You can check out what I did different here! Enjoy!
EDITED:
I have found that making yogurt is very forgiving over the past few months of making this recipe. I've been making 'mommy yogurt' as Little Miss Bacon calls it, at least twice a month now. I have had many readers ask questions and I wanted to put a few things on here to help out others that might have the same questions.
*Do I need to recheck the water bath temp after I place the jars in it?
-Nope! I have never re-checked the water bath temp to make sure it stays at 120*. I put the jars in the hot water and close the cooler and don't peek at all. When I take the jars out I know the water has cooled some. I have never re-checked the temp on it but I can tell just by touching the water it's not as hot as when I put the jars in. I've never had a problem with the yogurt from the water cooling.
*I left my yogurt sit longer than 4 hours, will it still be ok?
-YES! I have found many times I forget to pull the yogurt out of the water bath and it always turns out fine. Actually though these little mistakes I have found that letting the yogurt sit for 7-8 hours makes the best thick yogurt! So now I always let it sit longer. Sometimes I let it go overnight if I'm making it late at night. Always good yogurt!
*Whole milk makes the thickest yogurt.
*Can I use a sugar substitute?
-Yes! I have had a reader report back to me that she has successfully made the yogurt using stevia in place of sugar for vanilla yogurt. Also Since my kids are so sweet already, I have scaled my sugar back to 1/2 cup per gallon of milk used. No one has noticed a difference in the vanilla yogurt!
*I live in high altitudes, can I still make yogurt?
-I'm happy to report a few readers have been brave to try this for me and report back. They have had success with warming the milk to 170-180* and had the yogurt turn out. They did say that it took the yogurt a long time to reach that point (about an hour) but was worth it for cheap, delicious, homemade yogurt!
THANK YOU to all my readers who have used my recipe and passed it on! This is the most looked at recipe on my blog. I'm happy I have helped so many venture into homemade yogurt. And thanks to all those readers who have wrote to me letting me know the variations they have tried to make this yogurt work for them! I love hearing your stories.
Thanks so much for the very clear directions! I'm going to attempt this today!
ReplyDeleteI made the yogurt, and it's AWESOME! I'm just blogging about it now ;)
ReplyDeleteStacey I'm glad it turned out so well for you. I'd love to read your blog post about how it went! Thanks for letting me know you liked it. :)
ReplyDeleteThis has to be the best yogurt I've ever made. Thicker than the junk you buy in stores and way better tasting. And simple too. I'm in love.
ReplyDeleteThanks for the work you put into this recipe. This turned out so well. I have done lots of crockpot yogurt but it never thickens fully and I always have to strain it. This is SOOO much easier. This was wonderful with a great creamy favor! My boys wouldn't stop eating it tonight when it cooled. Now I'm thinking of all the wonderful favors I can make (mixed berry, pina colada, strawberry) in 1/2 pint jars so they are portable servings. (Ducko from DS)
ReplyDeleteI made your yogurt yesterday, and lets just say I had help. Circumstances worked against me, and well, my yogurt is just sweetened, flavored, milk that has been heated, had active cultures stirred in and cooled. Only the bottom 1/2 inch of each jar has set up. I am not giving up though, I will try again. My question is this, is there any way of saving this and making it into yogurt at this point? Is there any way to use it the way that it is?
ReplyDeleteI'm so sorry I'm late getting back to you on your comment. I hope you didn't throw out the yogurt yet! Right now there isn't much you can do to turn it into yogurt, however instead of tossing it, it will make very good smoothies! I'm thinking one of 2 things happened, either the milk wasn't heated hot enough to kill off the bacteria that might fight the yogurt or the starter was put in while the milk was too hot, which will kill the yogurt bacterial. I'm happy to hear you will give it another try. It's really awesome when it's nice and thick and creamy from the jar. Please let me know how the next batch goes.
ReplyDeleteI had a similar problem. I tried this recipe last week and it turned out thick milk, not really yogurt. I'm using it in smoothies, so at least my $3.50 isn't completely wasted! But I have no idea where I went wrong since I followed the directions to a T. I used a thermometer religously throughout. I wonder though, if my milk was UHT pasteurized. The container didn't say it was. How do you know?
ReplyDeleteI have been using it in smoothies and actually tonight I used it in place of milk in some waffles I made since I was out of milk. It worked beautifully!
ReplyDeletewell I guess I'm going to be the brave one and try making this using Splenda or Stevia instead of sugar since my dh has an intolerance. Do you think it will work?
ReplyDeleteCrystalb- Good Luck with the yogurt! It's pretty easy to make. As far as the splenda/stevia goes, I've never tried it so I'm not sure. You can always make the yogurt without sugar & vanilla too. It will just be plain yogurt (if you use a vanilla starter there will be a slight vanilla flavor to it but not much) Then you can add your own sweeteners, fruit, honey, maple syrup ect. to it. I hope it goes well for you. Let me know how it goes!
ReplyDeleteit worked! Thank you so much for posting this recipe! I made it using 0% source sugar free yogurt and then added vanilla for flavoring and stevia and it is so good. I was worried it wouldn't work but I needed it to be sugar free.
ReplyDeleteCan you do this if you use Lactose free milk?
ReplyDeleteChris
I have not tried it with lactose free milk yet. If you do I would love if you let me know!
ReplyDeleteI do something very similar, but instead of the cooler with hot water, I use a heating pad in a plastic bucket, and let the jars sit overnight. I've made the yogurt with soy milk too, and it comes out very well. Also, if you strain off the whey you can use it in bread recipes!
ReplyDeleteLOVE THIS! I have 5 kids (8,5,5,4,2) yes twins. They go through so much yogurt it's crazy! I love your site! So many great tips! Thanks for sharing your knowledge with us! Can't wait to try this!
ReplyDeleteI also pinned this so i don't lose it! :)
ReplyDeleteOooooh Im going to try this! We spend $15 a week on yogurt alone. Every one has to have their special brand. Pfff no more of this nonsense!!!
ReplyDeleteCan you add pureed fruit to the yogurt? My girls LOVE strawberry yogurt! I thought maybe I could add smushed up strawberries when I pour it into the quart jars. Have you tried that?
ReplyDeleteSadly no. I have tried adding pureed strawberries to my yogurt and it was a disaster! But you can mix them in after the yogurt is set up. We usually add fruit, jams, or honey once we dish it up. Thanks for stopping by!
DeleteMy husband has been making yogurt for a few years now. I just wanted to comment on a few things he does that have worked for him. He makes it with 2% since kids do need some fat in their diet. We also have used a variety of containers the favorite right now is the empty gallon the milk came in. Since the milk just came out of it he doesn't need to sterilize. It makes it so easy to just pour out into the personal blender cups and kids' bowls.He also uses greek yogurt as a starter. If you want to make your own greek yogurt just strain it through a cheesecloth lined colander. The liquid left is basically whey protein which he adds to after-workout smoothies. You can also freeze the whey protein into cubes for later use.
ReplyDeleteThanks for those tips Jessica. :)
DeleteJust made this yesterday (found this on pinterest), and followed your instructions (which were very helpful). I was excited to see if it worked, and this morning, I have 9 pints of wonderful vanilla yogurt which my children are devouring! A couple of simplifying steps: I did no have a chunk at the bottom of the pan of milk when I cooled it, perhaps because I stirred it constantly throughout the heating/cooling process, so there were no chunks at all. I don't have a little strainer, but it wasn't needed since there were no chunks or clumps in the milk mixture. I used 9 wide-mouthed pint jars, and a cooler with wheels (easy moving it around). It was a big success and I'm thrilled. Thanks so much for the helpful info! I'll be making this once a month or so!
ReplyDeleteI made this yesterday, and followed it to a T, and all I got is milk, but slightly thicker. I was so excited to make this, so I was being very careful as to what it said to do. :( I have no idea what went wrong. I plan on trying it again later this month.
ReplyDeleteBy the way, I love your blog! It has help me and the hubby budget, save money on food, and we starting making our own food as well! Thank you so much for changing our life! You are a stranger to me, but you have had more impact on us than anyone I know! Thanks again, and I can't wait to try the rest of everything on here!! :)
WOW it's nice to know I've been able to make such an impact with your family! I love hearing stories like this. Sorry the yogurt didn't turn out. I'm not sure what to say other than try it again. Perhaps with a different starter? Or let it sit longer - I now let mine sit up to 8+ hrs in the cooler. Also make sure it goes undisturbed when you move it from the cooler to the fridge. It will still be pretty liquid until it cools in the fridge. Good luck on the next go and thanks for stopping by!
DeleteWe made and it is awesome! I am so excited we are really on our way to saving on our food budget. It did not come out as think and creamy. We left it in the cooler for 7 hours. I followed your directions to the T. However I live in a high humid area and the kitchen temp was 80 degrees. On the food budget we came $25 under budget for our family of six.
ReplyDeleteHi! I recently discovered your blog via pintrest. I do believe I have read nearly ALL of your posts. (lol) I just love your blog! I made yogurt last night and it was wonderful this morning when I opened it up to try! It was super thick and creamy and tasted just like Dannon Vanilla, which is what I used as a started and was hoping it would taste like. I was so excited because I made a gallon for less than a large container of Dannon cost!! ($$$) I also made and froze some of your 2 ingredient muffins-they were a hit, and we even made tin foil meal, which is now a favorite. We are also going to start working on our food budget soon. Thanks so much for the wonderful blog! :)
ReplyDeleteHas anyone tried this with soy, almond, or lactose free milk?
ReplyDeleteI did make this with 2% milk and added whole blueberries. 2 cups in a half gal. of milk. It set up and looks good, we have not tryed yet.
I made this last week, with 1% milk and Activia plain sweetened yogurt as starter. It was not quite as thick as store yogurt, but definitely was yogurt! Thanks for the wonderful instructions, all the other instructions I've read seemed so daunting, but your instructions were easy to follow and made it so easy to do!
ReplyDeleteI used to make yogurt all the time. I found it actually came out thicker with less starter. I used just 1 tbsp or slightly over that per quart. I think the reason you seem to have extra milk is that a quart jar is actually a bit less than a quart. I've used a light bulb in the cooler, also an electric potpourri crock (basically a tiny slow cooker) filled with water.
ReplyDeleteThen I covered the cooler with an old quilt and left it about 7 hours
ReplyDeleteGreat Directions!! I have found another yogurt recipe and I have not tried it because it seemed like a lot more work. This one seems so easy and I will be going tommorrow to buy the yogurt starter! Thank you so much for all the helpful tips and do's and don'ts...great blog!!
ReplyDeletehave you almost scorched your milk when scalding? i smelled a slight burnt smell when scalding but i think it was the rim of milk residue on the side of the pot from reduction? the milk tasted ok. we will see! we are in incubation right now, i cant wait until morning to see if mine turned out!!!!
ReplyDeleteI have everything ready. Notes taken...wish me luck!!
ReplyDeleteThank you for sharing this!! :)
Going to try with a Greek yogurt starter. I'm keeping half sugar free for the littest one and I, and doing half vanilla for the older peanut.
We will see! And I will report back!
I have never used or own canning jars...do you need to have a new (don't know what to call it) flat sealer thing every time you make the yogurt???
ReplyDeleteOR I could get by using a recycled spaghetti sauce jar, as long as I sterilize the jars and lids??
Thanks for the post!
Hi Beth, Thanks for stopping by. For lids for canning jars since you are not heat sealing/boiling water bath for the yogurt you can re-use the flat lids each time. They also make screw on reuseable plastic lids for the canning jars now that I found I really like for my yogurt. I have heard from others that they have had success with spaghetti jars and even things like mayo and jelly jars too for their homemade yogurt. Good luck on making your yogurt!
DeleteCan't wait to try this! Thanks for sharing your recipe.
ReplyDeleteBrenda
I love this and cannot wait to make it! I just have one question, and forgive me if you already covered this or it was asked somewhere, but does it matter how much the jars are filled? I mean, after the four quart jars, can I pour the excess into another quart jar? Or does it need to be filled to the top? Silly question- I know! But if anyone will mess it up, it will be me! :)
ReplyDeleteI guess that the size doesn't matter! I made this and it was sooo good! Thanks so much for sharing your recipe! I may never buy yogurt again!
DeleteJust wondering if you have made buttermilk ? I had a recipe from a Norwegian lady years ago but do not have it now. Thanks. I used to make yogurt all the time. Enjoy your blog!
ReplyDeleteI'm now incubating my third batch since I pinned this a while ago and I'm really expired for this one! Forgive me if this was already mentioned in other comments, I haven't read through them again since the first experience... But the first time didn't go so well with the family because of the texture being so running. This last time, my second time, I strained it with cheese cloth over night after the first night being in the fridge to set- much better! But the ultimate perfect outcome was after straining it, whip it up with a hand mixer before putting it back into your jars! (((awww))) Best ever! So creamy! Even days after! Thought I'd share! I'm so glad I came across your blog! :)
ReplyDeleteExcited* not expired! :P
DeleteI've made yogurt before but have always followed the role to heat to 180 and then only for 2 mins. it turns out thinner than sure bought and the whey is kinda stringy. one time I accidentally let it get up to 185 and it turned out so much better ( and other recipes call for the addition of powdered milk to add extra protein to aid in thickening it. ) when I saw how different you're recipe was I decided to give it a try again since I have not made it in over a year. it turned out perfectly! I think the reason you get more than 4 quarts of yogurt is because you are adding the starter as well as the sugar, so it adds to the volume. I made mine with 1/2 cup of agave nectar in place of the sugar and used real vanilla extract in place of the imitation vanilla flavoring (I found both of these at ny local aldi, so they were fairly inexpensive). The difference in vanilla really makes a huge diff in flavor!
ReplyDeleteI made this yesterday for the second time, using the start from my previous batch. The first batch turned out better. It was pretty thick, but not smooth. I did forget to strain, but it was more like curdled. The second batch is even more "curdly" and less thick (and I did remember to strain this time). I followed the temperature suggestions perfectly with my thermometer. Anyone else with this problem? I'm wondering if it was too hot. It never boiled, and looked really good going into the jars. I really want this to work and am not ready to give up. Help!
ReplyDeleteMy 3 year old daughter is allergic to milk so we do not have yogurt very often, though all of my girls (13, 3, 2) love it. My question is would this be possible with almond milk?
ReplyDeleteI know you addressed checking the water temp in the cooler at 4 hours, but I was wondering if you check it now that you leave it in for 8?
ReplyDeleteI made my first batch of mommy yogurt today. Went and bought blue berries and strawberries to go with it for breakfast in the morning if it turns out. If it doesn't turn out we gots some cereal just incase...lol
ReplyDeletekartal vestel klima servisi
ReplyDeletependik vestel klima servisi
tuzla samsung klima servisi
çekmeköy vestel klima servisi
ataşehir vestel klima servisi
çekmeköy bosch klima servisi
ataşehir bosch klima servisi
ümraniye vestel klima servisi
kartal bosch klima servisi
Good content. You write beautiful things.
ReplyDeletetaksi
hacklink
mrbahis
mrbahis
korsan taksi
hacklink
sportsbet
sportsbet
vbet
Good text Write good content success. Thank you
ReplyDeletemobil ödeme bahis
bonus veren siteler
kralbet
poker siteleri
tipobet
betmatik
kibris bahis siteleri
slot siteleri
alsancak
ReplyDeletearnavutköy
ataşehir
avcılar
avşa
İ5E
erzurum
ReplyDeletegüngören
tokat
amasya
adana
CZP6
https://saglamproxy.com
ReplyDeletemetin2 proxy
proxy satın al
knight online proxy
mobil proxy satın al
X2O
شركة كشف تسربات المياه بالاحساء 00Q2lO05SI
ReplyDeleteشركة تنظيف مكيفات بالاحساء
ReplyDeletecTcwyEIZhJ
شركة تنظيف مكيفات بالاحساء
ReplyDelete70AblKhFWP