Wednesday, January 18, 2012

Well it works!

If you have a baby or toddler I'm sure you've seen those cute little food pouches they sell.  Bacon Bit loves them!  And so do I.  They are quite handy when we are in the van traveling or out and about.  Just twist off the top and hand it over.  Bacon Bit can drain one in under a minute I believe, I'm not complaining since he gets a dose of fruit in his diet.  He still prefers mostly veggies and that's ok too!

 There happen to be a few problems with those cute pouches that I'm not overjoyed with however.  The biggest is the cost, for a 3-4 ounce pouch of baby pureed food costs between $1.35-$3!  Not quite budget friendly.  But I have to admit even convenience of them has over ruled our budget a few times.  I was talking to another mom with a toddler the same age as Bacon Bit saying how I wish they made something re-usable like the pouches. Especially since I have a whole tote full of baby food that was given to us that needs to be used up and Bacon Bit makes a HUGE mess with a spoon and bowl of sauce.  She told me that she simply refills them.  I have to admit I had my doubts of messes trying to refill the darn pouch, but she told me to just try it. So I did and I was happily surprised!  Want to refill your own pouches? Here's how!

What you need:
empty baby food pouch with cap
medicine syringe (bigger the better!)
baby food sauce or any kind of pureed sauce


First take your pouch and rinse it out.  I held mine under the water and let it fill up a few times.  You can even add a small drop of dish soap to it.  Once it's filled I hold my finger over the opening and give the pouch a few shakes really good.  Repeat this a few times until the water runs clear. 


Next flatten out your pouch. Make sure there is no air in it.  If there is, I was told when you go to fill it, the puree will spray out of the pouch making a bigger mess!

Now take your syringe and fill it full of your puree.  Hold it over the opening and squeeze the sauce inside.  Repeat until you filled up the pouch.  It's just that simple!
Once it's full, twist the cap back on and either hand it to baby or place it back in the fridge.  I just saved myself a whole lot o' bacon for my pocket!!  And Bacon Bit is very happy to get his favorite pouch sauce more often. 


Now I'm not sure how many times you can refill the pouch, but even if you refill it a few times before tossing it will save you money.  And time wise I am able to refill a pouch in less than 2 minutes.  So not bad at all.  I'm so happy my friend shared this tip with me! I hope it helps some of you too.

Sunday, January 15, 2012

Never be afraid to fail!

Yesterday I decided to not leave the kitchen. Ok that's not entirely  true, I did get out side and shovel the snow that fell but otherwise I dedicated yesterday to a baking day.  I was tired of the kids complaining about having to have cereal 'AGAIN'?! (insert whiny kid sounds here).  I knew I wanted to make some danish puff since I happened to have 4 dozen eggs in the fridge, but I wanted to stock the freezer too and decided to make muffins. Lots of muffins! 

Mr. Bacon always loves the apple pie muffins so those went on the list.  I even added some walnuts to them! I was craving the yummy 2 ingredient pumpkin muffins.  But I have some extra time still and decided to make one more kind.  Digging though my recipes didn't spark any thing I just had to have, however digging though the pantry sparked my creative side!  I thought of how easy those pumpkin muffins were to make, just cake mix and a can of pumpkin.  Then I wondered if it was that easy with other mixes.  I happened to have a carrot cake mix on the shelf.  And a bazillion containers of applesauce baby food left over from Bacon Bit that needed to get used up. No I had no clue going into this if it would work.  But hey that's how great cooks are made.  There is a deal of science when it comes to making food, however there is always a space to be creative too.  Some of our favorite meals were one's we put together on our own like our curly chicken and peas and our lemon garlic chicken!  They are family favorites.  If we never experimented around, we would never have found them. So with my cake mix and applesauce in hand I headed to the kitchen. 


I dumped the cake mix and 2 cups applesauce in my mixer and away it went. I was surprised how it turned out.  In the bowl it wasn't thicker and dense like the pumpkin muffins mix. It was light and airy.  I honestly was a bit worried about how they 'd turn out.  I scooped them into mini muffin pans and baked them in a pre-heated 350* oven for about 16 minutes.  Took them out of the pan and let them cool on a rack, all but one. Nope I couldn't even wait for them to cool down to try them. I popped one in and they were amazing!  No heavy dense taste like the pumpkin muffin, just light delicious.  Success! 

 I happened to find a container of cream cheese frosting in the pantry as well when I was digging in there and though it would make the perfect topping to these muffins.  Yes it defeats the purpose of making 'healthier' muffins with just applesauce, but it's better than having made the cake according to the box and then putting the frosting on right?  They were a huge hit with all of us here and with Mr. Bacon's co-workers how happily sample my kitchen creations.  Ok the good one's anyway! 

 And to show not all my ideas turn out well, here was a flop!  I made a gallon of yogurt yesterday as well. I pulled out one of the gallons of milk I froze in the freezer back in August.  I had no idea if frozen milk would work for yogurt since I hadn't tried it yet.  It seemed like a good day to try. And Little Miss Bacon has been asking for some 'mommy yogurt' too.  I followed my recipe and filled three quart jars with vanilla yogurt.  Earlier in the day I took out a bag of frozen strawberries, yup the ones from the garden I packaged earlier, they've been wonderful to have all winter long.  I drained the strawberries saving the juice in a separate bowl (the berries went into a banana strawberry smoothie Bacon Bit and I shared).  With the yogurt left after filling the other jars, I added the strawberry juice.  I had thought it would make wonderful strawberry yogurt that Little Boy Bacon would like, he's not entirely hooked on just vanilla regardless of what I add in it.  Well I could tell from the moment I filled the last jar it would be a flop.  Straining the yogurt left a lot of chunky parts.


 I decided to give it a go anyway, at least it looked pretty!  I incubated the yogurt for 8.5hrs. and as soon as it came out of the water I knew it was a disaster!  The strawberry yogurt separated out completely.
 
  And I had no idea if it was good or not so my monster who lives in my garbage disposal ate it!  (yes the kids think there is a monster that lives inside our garbage disposal who eats all our scraps).  So that experiment didn't work, you can't win them all. However I did learn that using milk that was frozen for months in the freezer works great to make yogurt.  The other three quarts turned out just fine.  You win some, you lose some, but never give up trying!

Thursday, January 12, 2012

And I'm back!


Thank you all so much for putting up with my absence!  Ma Bacon took a much needed break during this busy time of year.  With the holidays, kids schedules, Mr. Bacon's work and much more I had to put the blog on the back burner for a bit.  Also during this time I decided to finally do something for myself!  Why do we mom's put 'us' on the back burner all the time?  I have decided to make make myself healthier for the new year and I have started exercising. While there was not a ton to lose, the spare tire had to find a new home! I'm happy to say in my time off I'm already lost a lot of inches and pounds.  I'm quite happy with the progress in such a short time.  If you haven't done something for yourself in a while, do it!  It's an amazing feeling.

But I'm back to all my wonderful fans here.  Thank you for sticking around while I was away. Happy Thanksgiving, Merry Christmas and Happy New year too! Sheesh I did miss a lot huh?!   I have to say I was shocked on all the new readers I've seen this over the past few weeks.  Thanks for visiting. I have found that a lot of you came view how we budget our groceries.  I love when my blog is shared. Hopefully soon I can post another shopping adventure and meal plan with everyone.   I'm also going to try to clear up some of the questions I found were asked about how it all works, I seem to find lots of questions about just what we eat! If you have a question you'd like answered feel free to email me! (please no spam or junk mail!)

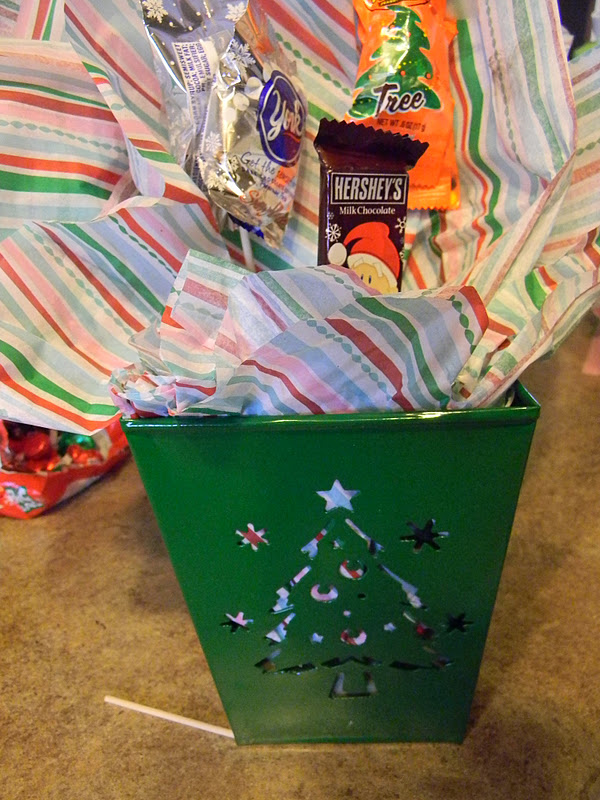
So what else  have we been up to?  Well the in December my siblings and I decided to surprise our parents for a family Christmas.  It was a fun, busy weekend and one of the best presents our parents got.  One thing we decided to do was a white elephant (or dirty Santa if you call it that) present exchange.  Our limit was one $10 gift per adult to play.  That got my creative side thinking.  I decided to do up some candy bouquets to pass on.  I think they turned out great!  This is easy to make in a short time and a huge hit!  Now I know what you're thinking, Ma Bacon, I don't want to worry about Christmas for 11 more months. I know me either!  But hey Valentines day is coming and these would be a great gift for your sweetie.


Here is what you need:
Container- I found these cute metal buckets in the Target dollar spot!
bamboo skewers
assorted candy of your choosing
Tape
Green floral foam- I used 3x3 squares for this found at walmart
Tissue paper
Candy cane, red pompom & brown pipe cleaner

Start by taking your container and pushing the foam square into the bottom. 
Next take a skewer and some candy and start taping candy to them.

Next fold up a piece of tissue paper, be creative as you want.  Take your skewer and poke a hole though the bottom of the tissue paper.  Then insert it into the foam block in your container. I did this for 3 pieces of tissue paper. Securing them down with a skewer to help prevent them from falling out. 

I even placed a piece of tissue paper in the front as well as the back of the bouquet.  Once you have a few sheets of tissue paper in there, continue to tape candy to skewers and place them in the foam.  I used scissors to cut the skewers down to different lengths to create a full bouquet appearance. 

I taped a few small (mini) pieces of candy together too and then placed on a skewer.
 
And to add something else I added a few kiss rosebuds.  To make the rosebuds, first cut a piece of clear plastic wrap about 4 x 4 inches.  I rough guess when I cut them, remember Ma Bacon rarely measures!  Then place 2 kisses bottoms together in the middle of the plastic wrap and fold the wrap around them.  Secure the 'tail' of the rosebud to the secure with tape. 


Add on more than one bud by following the same steps.
 Keep placing candy in where you think there's a bare spot until the candy bouquet looks nice and full.  


Somehow my camera ate my reindeer pictures! No worries you can follow how to make them HERE.  I made them for the kids to hand out to their class room friends last Christmas time. Everyone loved the few I stuck in the bouquet!  That's it! You have  fun easy and cheap gift.  If you are having a hard time finding a container for valentines day (or Easter, get well, birthday present...)  I made these out of those popular reusable straw cups you can find everywhere too.  These ended up being teacher gifts for the kids to give this past Christmas as well.  They were easy to make as well and I got a good deal on the cups.

I took my foam block and cut it in fourths.  Take one pieces and place it in the middle of a few pieces of tissue paper.  Then push it down into the cup.

 
I tucked the straw and lid on the back side of the cup.  Then I followed the same steps as above with the candy and skewers.  They were a big hit!
So that was my creative Christmas presents!  Oh besides this last guy.  Mr. Bacon needed a gift for his white elephant.  So we made up some Beer Deer.  They are so cute!  And a big hit too. Perfect for that hard to buy for person on your list!  Save the idea for next year!!
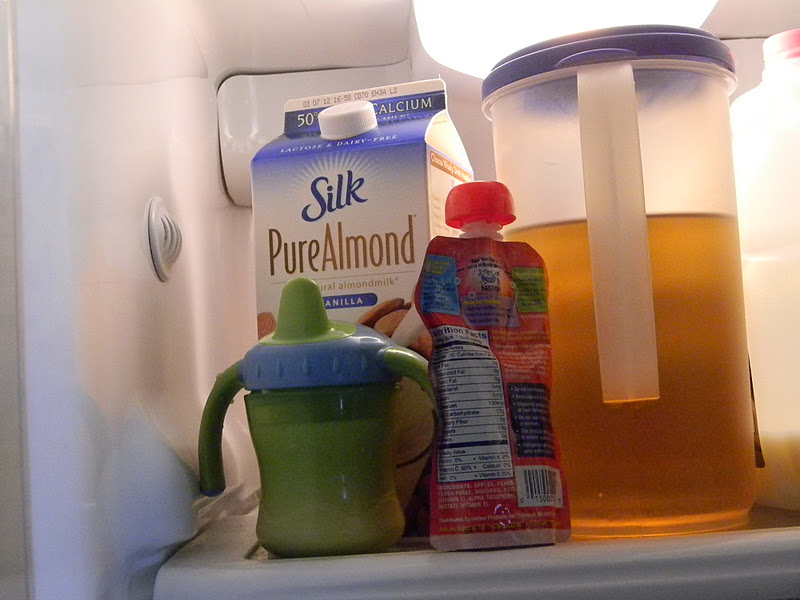