Saturday, January 29, 2011

Cutest little cubes!


Are they not just super cute! Little cubes of love for Bacon bit. It's hard to believe he's four and a half months old! Where has the time gone? Now that Bacon bit is older, he's wanting to eat ALL. THE. TIME! Not only is he never full, he also drools over the food we eat. That means it was time to start on some real food. And not anything that comes out of a jar, I'm making all of Bacon bit's food.

You're thinking homemade baby food, Ma Bacon, who has time for that? Honestly it takes very little time and saves a whole lot of money. It had been a few years since I bought baby food (yes, I did buy the jars with the other kids, see I haven't always had 'time' or so I thought). I couldn't believe how much the cost of those tiny jars have increased! My pocket book said enough, just make the food instead. I also think they taste so much better homemade and I can control the consistency. So where to start? Thankfully I have some great friends who shared their tips with me. I also found this website to be helpful.

I started with making a batch of sweet potatoes and a batch of peas. Nothing too hard and some good foods for Bacon bit to start with.

First off you need some supplies.

I use my KitchenAid blender
A skinny spatula

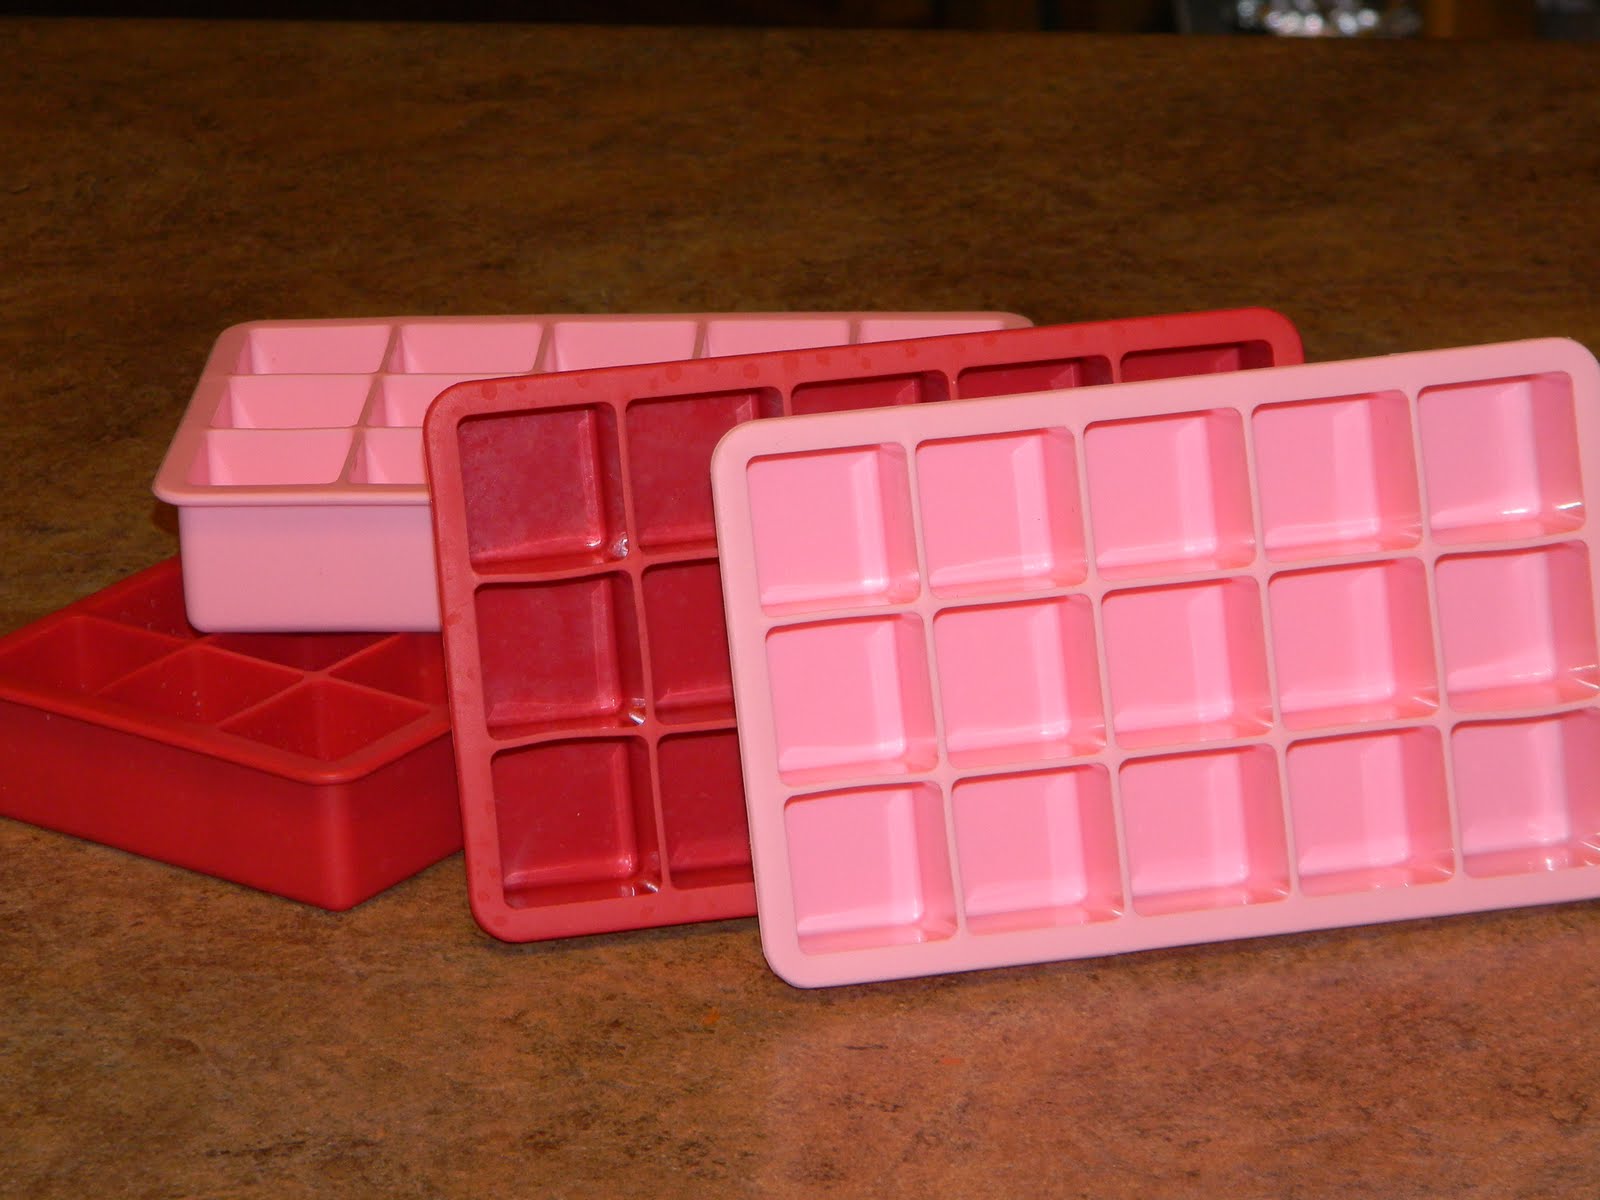
These cute square trays that just happen to be 1 oz in size (seen that pic somewhere before?!)

And my Kidco hand mill

That's it!

I started with sweet one sweet potato, you know these things! (Yes Yams are the same thing in most American supermarkets) There are pretty much two ways you can cook a sweet potato for making baby food, either peel it and steam it or bake it. I chose to bake it, nothing better than baked sweet potatoes! Slice the potato in half length wise, place it cut side down and a cookie sheet and add about a half inch of water to the pan. Place them in a 400* oven for 40-45 minutes or until a fork presses into them easily. I baked them in the toaster oven to save on some electricity, and it was already out from lunch.


Make sure to check on them a few times, After about 25 minutes I noticed I needed to add a bit more water to the pan. Here they are out of the oven. Next peel the skins off and toss it in the blender or food processor. When they are baked right the peels just fall off of them!


Once they are in the blender, they need some liquid to help turn them in to puree. That is where the water on the pan comes in play. Take the liquid and pour it into the blender too. I did have to add about 3/4 cup of water to the mix as well. You can use the liquid of your choice to do this, juice, water, ect. I was advised to not use Bacon bit's breast milk or formula if I was going to be freezing the cubes, so I opted for water. Now blend away! Here is a comparison of my sweet potatoes verses store bought jar sweet potatoes. You can see the jar one's are a lot runnier. Not bad for just starting out eating, but my babies have all preferred thicker foods. Also when I take a cube out and thaw it I can thin it down with more liquids (this is where you can add the breast milk or formula if you want) to get it just how Bacon bit likes it.


Now it's time to get them ready for the freezer! Pour the puree into the cube trays. You don't have to use the cute square cubes like I have, any ice cube tray will work. I like the cubes because they are silicone and the puree pops right out of it. Also they are a nice 1 ounce size. Once the puree is in the trays I use the spatula to make sure they are level on top. Then I pick the tray up and gently tap it a few times against the counter to get out any air bubbles. I wipe off the edges a bit and it's ready to freeze.


Now on to the peas.

I preferred to steam my peas for Bacon bit's food. I have a nice steamer that came with the cook ware Mr. Bacon and I bought several years ago. I also decided to use frozen peas since it is not prime veggie picking season in Minnesota.

Steam the veggies according to the package or until they are tender. Yes since these are in a steamer bag I could have placed them right in the microwave, however I think the microwave cooking kills off most the healthy nutrients in the food. This would be the same process I would have
done if I was steaming the sweet potatoes or any other fruit or veggie. Once they are cooked until tender, take the peas and place them in a bowl of cold water. I have been told doing this step with food like peas and beans that have 'skin' on them makes them puree easier.


Once they rest in the water and cool for a minute or two place them in the blender. You need to remember to add a bit of liquid to them. I used 1/2 cup of the water I placed in the kettle for steaming the peas, that way the nutrients that went into the water during steaming, go back into my son's food. Now puree away!


Peas when they are pureed still tend to be chunky due to their 'skins'. For an older baby this wouldn't be a problem. However for just starting out, I wanted the peas a bit smoother. I bought this amazing food mill that solved the problem. I put the puree in the mill, and out came smooth peas perfect for baby's first foods! And a picture of what's left after the mill process!


Here you can see the difference between the two.


Now it's time to put them in the trays. Repeat the process I used above for filling the sweet potatoes. There, all ready for the freezer!


A few hours in the freezer later....


Best thing with these cubes is that they will also stack in the bag to store upright!


Perfect little cubes of love for baby Bacon bit!


Well that turned into a pretty detailed post! I hope this helps others out on making their adventrue in homemade baby food a bit easier! You can do it!

Tuesday, January 25, 2011

Bad Banana


Bad Banana, Bad Banana..
Whatcha gonna do?
Whatcha gonna do when I come for you?

Ok so maybe I don't have a new hit on my hands! But what do you do when you have bananas going bad? Don't throw them out, they are perfect for baking with! I love letting some of the bananas we buy go brown because then I can make some of the best muffins with them. Everyone in the house loves muffins for breakfast and if I can hide good stuff in them, all the better for my picky eater Little Miss Bacon. From the time she started eating she hated bananas, but since she can't see the banana, she will eat these muffins by the handful in the morning. Mr. Bacon gave them two thumbs up when he sent me a text this morning saying "those banana muffins ROCK!" You know you have a winning recipe when everyone gobbles them up.

Banana Crumb Muffins:
1.5 cups flour
1 tsp baking powder
1 tsp baking soda
1/2 tsp salt
1/2 tsp nutmeg
1 tsp cinnamon
3 med. bananas mashed
3/4 cup sugar
1 egg slightly beaten
1/3 cup oil

Crumb topping:
1/3 cup brown sugar
2 tbsp flour
1/4 tsp cinnamon
1 tbsp cold butter or margarine

Preheat oven to 375*. In Bowl or mixer, combine sugar, oil, egg, and banana. Mix well. Add in cinnamon, nutmeg, salt, baking soda, baking powder and flour. mix until all is combined. In separate bowl combine brown sugar, flour, cinnamon, and cold butter until mixture looks crumbly. Place batter in well greased (I use olive oil cooking spray) muffin pan. If making regular size muffins (will fill 12 muffin tin pan), bake 18-20 min. During the last 5 min of baking, top muffins with crumb topping to prevent it from sinking into middle of muffin while baking. For mini muffins (my batch made 3 dozen!) place batter in greased pan and add crumb topping before baking. Bake 13-15 min. Cool on wire rack.

To make these even healthier, replace 1/2 cup flour with whole wheat flour. You can replace 1/2 or all of the oil with applesauce and you can decrease the sugar to just 1/2 cup. Next time I make these I will try out some of the healthier options. I usually replace oil with applesauce in my recipes, I just ran out in the house this time around.


Sunday, January 23, 2011

Soups on! and a cheap treat


It's COLD outside! Temps on Friday here were -29 with wind chills in the -40's! Needless to say I'm ready for spring to come. The only thing that warms me up on those days is a nice bowl of soup. One of my favorites is potato bacon soup. Delicious, creamy goodness in a bowl! Does it look wonderful! Serve it up with a nice warm biscuit and you've got dinner.

Like my last soup post, it's defiantly a meal Mr. Bacon and I liked the.. ahem... older we get. But even our picky eaters will gobble this one up. Bacon Jr. is actually quite the soup lover and will request it from time to time, right after asking for tacos!

Like all great recipes I was happy when this one was passed on to me, and I want to pass it on to you. One of my favorite things about this recipe besides being a cheap meal, it goes in the slow cooker!

Potato Bacon Soup:
8 cups course peeled potatoes chopped (I use reds and leave the skins on instead of peeling)
1 small onion chopped (about 1/3 cup)
1/2lb crisp bacon- crumbled
1-8oz cream cheese
3 cans (14.5 oz) chicken broth
1/4 tsp pepper
1 can (10 oz) cream of chicken soup

In 4qt or larger crock pot, combine cream cheese, soup, broth and pepper. Add in onion, bacon and potatoes. Cook 4-5 hrs on high or 7-8hrs on low. When done, mash with potato masher until desired consistency, a little for more liquid soup, mash lots for more of a 'chowder'.

Like always, I make my own broth from bouillon, I put in 5 cups hot water and enough bouillon to match cups worth according to directions. I love to top mine with some shredded cheese and a little more crumbled bacon.

Yesterday we treated the kids to pizza at our local dine in pizza place. We love this little restaurant. It's warm and cozy and run by some wonderful people. Of course the kids thought after they had pizza in their tummies, they needed some ice cream to go with. Little Miss Bacon suggested her favorite Dairy Queen as the place of choice! Lucky for my pocket book, DQ is closed in the frozen tundra of MN by us during the winter. Instead we made our own fun treats at home. The kids had a blast making their own sundaes. A few years ago I was at Goodwill and found these dessert cups (6 of them for under $2!), they are perfect for making a treat extra special. A sundae cup + ice cream +chocolate sauce + whip cream + sprinkles = Happy kids for under $1. SUCCESS!

Thursday, January 20, 2011

What is growing on your counter?


Remember this picture? I've been asked several times over the past years "what is in that bag?" And each time I tell the person asking, "the best bread you've ever had!" Nope this isn't another biscuit post, but it does include yeast. I promise this one won't take as much effort!

I remember seeing baggies of odd looking batter sitting on Grandma Bacon's counter when I was little too. I'd poke at it, squish it, and wonder what the heck it was, until baking day! The smell of a sweet breakfast bread filled the house, just as mine did today. Even the kids exclaimed that it smelled like cookies baking in the oven. So what is it you ask? Amish friendship bread, and the secret to making it is letting it 'grow' on the counter for 10 days. Traditionally someone gives you a bag of starter mix along with a recipe. You are to add to it and care for it for ten days. On that tenth day, you add a few more things to the batter, and divide it out into baggies and pass it on to your friends. After you hand out a few, you might find your friends running in the opposite direction when they see you coming down the hall! Yes they get a bit hard to giveaway after a while! My solution, bake the whole batch for yourself! It will make a lot of breads, but what better to have in the freezer than some yummy breads for breakfast, snack time or unexpected guests.

Here is the starter recipe.

In a GLASS or PLASTIC bowl (this step is VERY important. You don't want to use anything metal when mixing this recipe up which also means mix with a plastic spoon, rubber spatula, or my favorite a silicone whisk) mix:

1 package active dry yeast
1 cup milk
1 cup flour
1 cup sugar

Pour into a large plastic zip top baggie and label with the date. Place it on your counter- don't worry it will be ok! You've completed day one!

Day 1: Do Nothing.
Day 2: Mush the bag and let the air out
Day 3: Mush the bag and let the air out
Day 4: Mush the bag and let the air out
Day 5: Mush the bag and let the air out

Day 6: Add to the bag 1 Cup flour, 1 cup sugar and 1 cup milk. I mix these up on a bowl again (remember NO METAL!) and I have Mr. Bacon help me pour it into the baggie. You don't need a second set of hands, but it does help! Mush the bag and let the air out.

Day 7: Mush the bag and let the air out
Day 8: Mush the bag and let the air out
Day 9: Mush the bag and let the air out

Day 10: Mix and divide starter as follows. Pour the entire contents of the bag into a non metal bowl. Add 1 1/2 Cups Flour, 1 1/2 Cups Sugar, and 1 1/2 Cups Milk and mix well.

If you'd like to share the starters with friends, measure 1 Cup Batter into 4 gallon size zip lock bags. Keep one for yourself and give the other 3 to friends along with a copy of the recipe. You will end up with 5 batches of bread (4 bags and 1 in the bowl) Since I make the whole batch for myself, I skip this step.

Now you are ready to add the rest of the ingredients and bake the bread! One thing I love about this recipe is that there are so many ways you can make it. Today I made Regular (vanilla), Pumpkin spice, Chocolate peanut butter & lemon poppy seed. I can't wait for breakfast tomorrow!


Preheat your oven to 350 degrees. Place about 1 1/2 cups batter in the bowl - remember no metal spoons or whisk- use only plastic or wood for this!


Add:
3 eggs- beaten in a separate bowl before adding
1/2 cup milk
1 cup oil (you can make this healthier by doing 1/2 oil & 1/2 applesauce or all applesauce!)
1/2 tsp vanilla

1/2 tsp salt
1 1/2 tsp baking powder
1/2 baking soda
1 cup sugar
1 large box instant vanilla pudding (or 2 small boxes)
2 tsp cinnamon
2 cups flour

*If using Self - Rising Flour omit soda, salt and baking powder.

All ready for the oven!
Grease two large loaf pans or one 9x13 inch pan. You can also make muffins with the mix. One batch will make over 4 dozen mini muffins or over 24 regular muffins. I say over because I don't have more than 2 muffin pans and I usually take the left over batter and bake it in a ramekin dish in the oven. The kids love these special 'mini' loafs! Bake 350 for one hour for loafs, 15-18 minutes for mini muffins or 20-25 minutes for regular muffins, or until a toothpick placed in the center of the loaf comes back out clean.

Here are some variations you can use that came with my recipe that was handed down to be my a friend. Feel free to make your own flavors too. You really can't go wrong with this bread.

Pumpkin:
Add 1 box pumpkin spice pudding and 1 vanilla instead of just the vanilla or two pumpkin spice pudding mix. I add in 1/2-1 tsp of pumpkin pie spice to this too!

Chocolate Bread:
Use the basic mix recipe except use Chocolate Pudding instead of Vanilla make sure to add the 2 tsp cinnamon it really makes the bread taste the best.

Peanut Butter Cup:
Used basic mix recipe, except use Chocolate pudding instead of Vanilla. Omit the 2 tsp cinnamon in the batter. Add 4 Tablespoons creamy peanut butter to the batter and one bag Reese's peanut butter chips. I didn't have the peanut butter chips this time, but it still tastes great without them.

Cherry Cheese Cake or Strawberry Cheese:
I used the basic mix, omitted the cinnamon and used two small boxes of cheese cake pudding instead of the vanilla. I added a small pack of cream cheese or 1/2 large pack (3-4oz softened) and 1/4 cup more milk. You also need a can of Cherry or Strawberry pie filling. After putting the batter into the pans dab teaspoons of cherries on top of them and swirl around with spoon to mix in the cherries. Cook at 325 until dark golden brown.

Cinnamon Struesel:
Before I start the Amish bread I get my pans ready and make the streusel 1 stick butter or margarine at room temp. 2/3 C – 1 cup packed brown sugar 2/3 C – 1 cup flour cinnamon - as much as you like. Put the ingredients together. (1 C chopped pecans are optional.) This will make approx. 2 cups. If you like a little more, increase the sugar and flour to 1C each.
Make your Amish bread according to directions. Use French Vanilla pudding or Vanilla Pudding. Put approx. 1-1/2 C batter in the bottom of each pan and spread into the corners. (Batter will not be runny - sort of a heavy batter.) Top with 1/2 C streusel, remaining batter and remaining streusel.

Banana Nut Bread:
Use the basic mix with 1 cups of walnuts or pecans , 2 large mashed bananas and 1 large box of banana cream pudding instead of vanilla pudding.

Lemon Bread:
Substitute lemon pudding mix and use 1 tsp almond extract instead of vanilla, omit the cinnamon. You can add in 2 tsp poppy seeds to the mix.

Butterscotch Bread:
Add 1 Large box of butterscotch pudding and 1 1/2 cups of butterscotch chips. Omit cinnamon.
proceed with recipe.

Apple Cinnamon Bread:
Make the streusel 1 stick butter or margarine at room temp. 2/3 C – 1 cup packed brown sugar2/3 C – 1 cup flour cinnamon - as much as you like Put the ingredients together. (1 C chopped pecans are optional.) This will make approx. 2 cups. If you like a little more, increase the sugar and flour to 1C each. Make your Amish bread according to directions. Use Vanilla or French Vanilla pudding. Put approx. 1-1/2 C batter in the bottom of each pan and spread into the corners. (Batter will not be runny - sort of a heavy batter.) Add 1 can apple pie filling evenly throughout the each loaf. Top each loaf with remaining batter and the Add streusel topping last, bake as directed.

Orange Pecan:
Use Orange extract (I use about 4 Tsp). You can also add 1/3 c. of orange juice and use only 2/3 c. of the oil. I have also used Orange Zest as well and then use the juice of the orange instead of juice. I have used chopped pecans and have also done it with toasted Almonds as well.

Tropical paradise:
Replace vanilla pudding with cheesecake pudding. Add 1 small can of mandarin oranges and
1 small can of crushed pineapple(I mix the oranges and pineapple together to equal about 1/2-3/4 c. of fruit) Add:
1/4 c. coconut
1/2 c. white chocolate chips
1/2 c. Chopped macadamia nuts (optional)
This bread is so moist you have to cook it a little longer than usual.

German Chocolate:
I use the chocolate pudding instead of vanilla. Take a can of German Chocolate frosting and cut it into the pans using a knife. This takes a little longer to bake as well.


So how do I keep all these yummy treats from going bad? My second favorite kitchen gadget, my food saver! My model has a button that I can stop the suction of air and just seal the bag half way though which makes it so I can't squish the breads. They freeze very well this way. Don't have a food saver? No problem, you can wrap the bread in plastic wrap and tin foil or freezer paper.


So plan ahead a get a starter bread going, what kinds are you going to make? Make sure to look at your calendar, you want to make sure 10 days from now you will have time to bake up the bread!

**Many have questioned how the milk can sit out on the counter without going bad, it is because of the fermentation process that happens when you add the yeast. It's much like a sour dough bread. If you are worried, according to some studies,starting with a buttermilk instead of pasteurized milk is slightly more safe because of the bacterial cultures. But if you are making it all for yourself and baking one large batch instead of passing the starter on, It's ok to just use regular milk. I hope that helps clear up some confusion. I'm happy so many are trying out this recipe!

**If you are sharing this starter with others, there should be about 1 cup starter in each bag.  The person you pass it on to will take the starter and add day 1 ingredients to it and follow the rest of the 10 days before baking. :) They might not get as big of a batch out of it but it won't be that noticeable. Happy Sharing!
 

Wednesday, January 19, 2011

Fixed that problem!


A while ago I was able to get a Lysol hands free soap pump for free with 2 bonus refills. I love the idea that I don't have to touch my soap dispenser to get soap, especially when I've just cut up raw chicken or handled burger. Helps cut down on germs around the house. Or at least I hope! With 4 kids around, the less we are sick the better. It didn't take too long before we needed another refill for it. Being Ma Bacon, I thought I could just pop the top (Or bottom I guess if you've ever seen one of these) off and refill it with my cheap soap. No chance. I tried everything to pop the top off to refill it with no success. Sigh... off to the store I go.

I was shocked to say the least at how much the refills for them cost! At our walmart it was $3.50!! I gulped and reluctantly bought another one. I had a hard time with the cost as you can imagine, keep buying those and there won't be much bacon to stash in my pockets! I was chatting with an online friend today about how I love the soap dispenser but hate how expensive the refills were and she gave me the solution I was looking for!

She told me that she had her husband drill a hole in the top, and then used a cork to plug the hole once she refilled the dispenser! GENIUS! Of course my dispenser just ran out this morning too, just my luck! I had to try it. I got out my handy drill and got to work.

A few minutes of time, some surgery with a tiny drill bit and a knife and viola! Ok so it doesn't look all that pretty, but that's what I get when I'm too impatient to wait for Mr. Bacon to come home and help me. I did file down the edges so it's not so sharp after drilling several little holes with my tiny drill bit and cutting them apart with the knife. All I needed was a cork for it. I grabbed one of our wine corks that we keep in a jar in our kitchen and cut it apart to make the perfect stopper! I refilled it with dish washing soap and tested it out. Works perfect! Problem solved and more money to keep for myself!

Monday, January 10, 2011

Hot BUNS!


Want to know one of my food downfalls? BREAD! Hot, fresh from the bakery, all nice and fluffy and soft bread. I think I could eat a whole loaf of fresh bread to myself. But who has a bakery right next door to them?! (OK I'm sure someone does, but really who wants to pay bakery prices?) Making bread really seems like a hard, long process. It's making you sweat just thinking about making it right? I know what you are thinking, oh but it's only a few dollars at the store, I'll just pick some up. But there is nothing that compares to the smell of fresh baked bread from your oven in your home that YOU made! It's really not that hard to do, and it will save you some money. Especially if you have one of these fancy mixers. I LOVE my kitchenaid mixer. I've had it for two years now and I don't know how I ever lived without it! It's so much a staple in my kitchen that I believe it needs it's own name. Any suggestions? You don't need to have a mixer to make these biscuits. You can just use a bowl and spoon for mixing and your own hands for kneading the dough, it will just be a bit more work, but still worth it in the end I promise!

Tonight's dinner plan was Cheeseburger mac. No not the kind that comes from the box with a red & white glove on it, no "Helper" for my hamburger in this house! Mine comes from scratch and tastes a whole lot better! More on that later. I wanted some biscuits to go with dinner tonight. Not just any biscuits, but warm, fresh from the oven dinner rolls. I used to buy frozen dinner rolls that you had to take out of the freezer and let rise all day before baking, then I thought to myself... "Ma Bacon, you don't need to pay for overpriced biscuits, make them yourself!" And so I did. I found this recipe for the most delicious dinner rolls on one of my favorite recipe sites a while ago and finally decided to dig it out and try it.

Sweet Dinner Rolls
1/2 cup warm water ( about 110*)
1/2 cup warm milk (about 110*)
1/3 cup sugar
1 - .25 packet yeast or 2.5 tsp yeast

* Place water and milk in mixer bowl add sugar to dissolve. Add in yeast and stir just a bit. Let this sit for 5-10 min. This is called proofing the yeast. Your yeast should get nice and bubbly.

Add in:

1 slightly beaten egg
1 tsp salt
1/3 cup softened butter or margarine

Mix.

3 3/4 cups flour

SLOWLY (unless you like a flour storm in your kitchen!) add in the flour. Your dough should start to form a ball. If it seems sticky yet, add in more flour. If it seems too dry and won't form a dough ball, add more water. Once you have a nice dough ball, let it kneed for 5 or so minutes in the mixer. See I love my mixer... it does all the hard work for me!

Take the dough ball out of the mixer and place it in a WELL GREASED bowl (spray it with cooking spray). Put it in the bowl, and then flip it over so the top of the dough ball gets some of the grease on it too. Take out some plastic wrap and spray that with cooking spray as well. Place spray side down over bowl.


Place the bowl some place warm, ideally I like to place it in a nice sunny window. Currently in Minnesota we don't get to many of those days. On non-sunny days or if placing it in a window due to lurking pets or curious toddlers is not an option, you can place it in a warm oven to rise. First start your oven to 200*. Once the oven is pre-heated to that, TURN IT OFF and place your covered bowl in the oven. make sure the racks are not to close to the top, you want room for your dough to rise. Don't worry, the plastic wrap won't burn or melt in the oven as long as it's turned off. Let the dough rise for 45 minutes to 1 hour. This is a great time to kick back with a nice drink, a good book and relax! After all, making bread is hard work and you need to pamper yourself (or at least that is what you can tell people who are amazed that you bake your own bread!) Once the dough ball has doubled in size, take it out. Turn your oven back on to 200* to pre-heat again.

Take the plastic wrap off carefully and save it, I'll tell you why in a minute. Clear off a work surface for your dough. I use my built in cutting board for this step. I FINALLY found a good reason to use this cutting board. Honestly I tend to forget about it for chopping other foods for some reason. Place some flour on the work area, you don't need much no more than 1/4 cup. I have way too much on my board here. Take your fist and punch it in the middle of your nicely risen dough. I know seems mean right! Here you have this beautiful dough ball, and you need to destroy it. Trust me, it's all worth it in the end!

Kneed the dough in a little flour, not too much. Kneading is just a fancy word for making a dough ball again. Little miss Bacon and Little boy Bacon do this all the time with their play doh! Once you have a dough ball, now the 'work' begins. Decide what type of biscuits you want. You can just have nice round biscuits by creating lots of smaller dough balls. Take your dough and cut it into 12 biscuits. Roll them into balls again and place them on greased pans or a 9x13 baking dish so the ends just touch. Make sure to leave room for them to expand again. You can even get fancy and roll the dough out into big circle, cut into wedges like a pizza and then roll them into crescent rolls if you'd like

Today I decided I wanted to make pull apart biscuits. The kids love that they can tear their bun on their own and butter it. I cut my dough in half. Then each half I cut into twelve pieces. Each of those twelve pieces I cut in half again- so total I have 24 little pieces. I rolled those into balls and place 2 of each in well greased muffin pans. Then I repeated with the other half of the dough.

It seems like a lot of work. Really it's not, just stepping out of your comfort zone. It took me only 15 minutes from the time the dough came out of the oven as a big dough ball to getting them ready to go back in the oven again. Cover the pans with the spray covered plastic wrap you saved from earlier. Now they are ready to sit in the oven again. TURN OFF YOUR OVEN AGAIN! :) And place the pans in there to rest for another 30 mins. Go back to that book you were reading and pick up where you left off! Ok so I can dream right. If I didn't have 4 kids that needed me to go in 4 different directions all at once, I'd love to pick up a book and get lost in it while I have bread rising in my oven.

After about 30 minutes, or when the biscuits have doubled in size, take the plastic wrap off the pans. Turn the oven on to 350* and bake for 16-18 minutes or until the biscuit tops are golden brown. Take out and cool on wire racks. I brush the tops of my buns with some butter right when they come out of the oven. Makes them even yummier!

How can you say no to one of these?! Delicious. They taste and look like you slaved away in the kitchen all day long! (and you did, how far did you get into that book?!)


They went perfect with my cheeseburger mac.

Cheeseburger Mac:
1 lb ground beef
1/2 med. onion- chopped
2 cloves garlic chopped
1 can cheddar cheese soup
1 can cream of chicken soup
2/3 cup milk
1/4 tsp salt
1/4 tsp pepper
2 cups cooked elbow noodles
1 cup shredded cheddar cheese
1/2 breadcrumbs- optional

In skillet brown burger with onions and garlic. In mixing bowl combine soups, milk, seasoning and half the cheese. Add in cooked noodles and burger. Mix well. Place in greased 9x13 pan. Sprinkle breadcrumbs on top. Bake in 350* oven for 45min. During last 5 min add remaining cheese to top and let melt.

It was an amazing dinner for a cold winter day!

I want to say "Thanks" to all my readers. Please keep coming back and checking on the Bacon house. I have some big things in store that involve these:


Please feel free to leave a comment or just say Hi! I'm still looking for the perfect name for my mixer... any suggestions?

Wednesday, January 5, 2011

Happy New Year!

Wow a whole new year, where did the last one go?! It seems since having kids my days go by at light speed. This year I'm trying to slow that down a little. I can't say I'm completely sad to see 2010 go away. It was a bittersweet year at the Bacon house, from the loss of our daughter, to the birth of Bacon bit there was a lot going on. I'm hoping 2011 will give us more happy times than sad. Looking ahead it's time to make some of those happy times happen! Most of the good things in life take a little work. So with the new year did you make any new resolutions to help your outlook for 2011? I didn't! I've learned that resolution never get finished. So I make myself some goals instead.

Here are some of the goals hope to achieve this year:
*Keep paying off Debt. This is hopefully looking pretty good. Each time I pay bills I re-evaluate in my head how long until the next one will be paid off. It keeps me on my feet and yes usually gives me a headache, but knowing that will be one less bill I have to pay helps me keep my non-essential spending in check.

*Sticking to our budget, and tweaking it a bit too! A good budget can always use some fine tuning I've found over the years. I think back to when my budget envelops had just 4 categories!! Have you thought about your budget yet? Or are you thinking of starting one?

*Another goal I want to try this year is to see how much 'free' money I can get and stick it in our gifts budget. I was shocked this year on how many gift cards or items I earned for doing just a little easy work! This year I won 7 giveaways, just by signing up online- painless and it only took a few minutes. A few of these prizes went to gifts. I cashed in on my reward programs (like the debit card that's linked to our bank account, we get points for every dollar spent). The other big one I found is Swagbucks. It's amazing how fast the points add up! I started this the end of may and with a few minutes of computer time I have been able to get $60 worth of Amazon gift cards this year! You get awarded points for searching the web (I did install their tool bar and it helps), finding special codes and entering them, doing surveys, and polls. If you haven't signed up for your free money yet, sign up here! Nothing to lose and lots of free money to gain. The gift cards really helped buy christmas presents this year and with Amazon's free shipping it's a win all around!

*I want to show my kids that having a good time doesn't always involve spending money, or having every toy advertised on TV. If you're house is like mine, it's swimming in toys... AGAIN. Of course I'm still hearing the 'I'm bored' from the kids. Today is one of those days I need to pull out something 'new'. It's snowing and freezing cold and the kids are going stir crazy! Little miss Bacon and Little boy Bacon wanted to dig out the playdoh. Oh how I despise playdoh! There is always a huge mess to clean up, but the kids love it so I let them play away. Today they wanted to make cookies. It's amazing how some doh and cookie cutters will occupy kids for hours! I surprised them with their very own 'oven' to bake their cookies in too!


Here is Little Miss Bacon's, If you look close you can even see she added 'on' and 'off' buttons to her oven!


And of course Little boy Bacon giving me a peek at whats baking in his oven! Thank goodness for boxes and tinfoil and a almost no cost activity for the kids that keep them from fighting for over an hour now!


I know I have more goals to add to my list along the lines of finding more healthy, cheap meals to serve, what other snacks can we make instead of buying at the store, hand making some of the gifts to give this year, to name a few. What are your goals for this year? I'd love to hear them