Monday, August 30, 2010

Cute as pie

Last week my brother stopped by on his way across the country. It had been a long time since I saw him last (almost a year!) So I decided to make something special. Aren't they cute!
Mini pies!

I've seen them on the Internet for a while at places like HERE and HERE. And I've been wanting to try them. I've had the jars for a while too, and apples in my fridge! I guess it was the right time.

I started with a batch of the pie crust recipe below that my mom handed down to me.

Pie Crust:
4 cups flour
1 cup crisco or similar shortening
1 tsp salt
1 cup cold water
2 eggs

Beat eggs into water. Combine all ingredients in a bowl and mix until a ball of dough forms.


I made a HALF batch of this dough and was able to get 6 jars with a little extra dough, probably could have gotten a 7th one if I wanted to. A full batch would easily get 12 jar pies.

You can roll this out to make a pie crust with top too.But for me I just needed the dough. take 1/4 of dough and set aside for tops. With the remaining dough I pulled off pieces of it and pressed it into the bottom and sides of my ungreased jars.

Next to get the filling.

NOTE that this is what I used for filling 6 jars. If doing 12 jars, double what I have here.

Apple pie filling:
4- med sized granny smith apples (any apples will work) or about 3.5 cups of diced apples
2 TBSP lemon juice
2 TBSP sugar
2 TBSP brown sugar
4 TBSP flour
1 tsp cinnamon
1/2 tsp nutmeg
1.5 TBSP butter

Take cut up apples and toss with lemon juice until all apples are coated. Mix sugars, flour and spices with apples until well combined. Place in crust lined jars, Add 1/4 tbsp butter to top of apples.

Next take the remaining 1/4 of the dough we saved out and roll out to about 1/4 in thickness or so. Take a lid from the jar and use it to cut out the perfect size circle for the top of the crust. You can take a small cookie cutter and cut out a vent hole for the top of the pie or if you're not feeling so fancy, once the pie crust top is in place take a sharp knife and cut a few small slices in the top of the dough for venting.


Next take a circle top and place it on top of your apples, you can press down the edges to meet up with the crust on the sides of the jars to prevent a lot of apples leaking out.

Now they are ready for the oven. OR.... the freezer! YES you heard that, these cute pies can go in the freezer when ready. Just place the lid and ring back on the jar, and they are ready for the freezer.

When you want to have a fancy desert where others think you spent hours making, just pop some of these out of the freeze and bake them. Or how about a nice little treat for you with some ice cream while the kids are in school! Shhh.. I won't tell they you had pie while they were gone either!

When it's time to bake, you don't need to thaw these pies from the freezer since they are made in canning jars that are made to hold up to extreme temps. But if you feel more comfortable, no problem letting them warm up a bit before throwing them in the oven.

Before baking these, I brushed them with a little melted butter and sprinkled some sugar on the tops too to make them taste even better!

Here are mine all ready to get baked. I did put them on a baking sheet to handle them better and so they would sit on my oven rack. Bake at 350* for 50-60 min.

I served them with a dip of maple nut ice cream and they were fabulous! They might look like they take a long time to make, but it was about 30min from start of making the dough & chopping apples until they were ready for the oven. Not too bad.

Feel free to be creative, try your favorite crust recipe in them and your favorite pie filling. Yes canned filling works just as good and a homemade kind. With being mini pies you can make up a favorite kind of pie for everyone in the family. Enjoy!

Tuesday, August 24, 2010

I feel like Chicken tonight

A few things I hate, doing the dishes, and having to make meals with lots of ingredients! So I try to avoid those as much as possible. We love chicken meals around our house and during the summer one way to avoid the mess and make great meals is by grilling. I get minimal mess and Mr. Bacon does the grilling so I get a night off! But we do have our fair share of chicken meals I cook on the stove. I'll share a few of our favorites.

The first thing you'll have to get started for some of these meals is sauteing the chicken. If you're unsure how to do that, I'll walk you though it.

First take your chicken breast (I use frozen-thawed, but fresh works too!) and cut them into smaller pieces, either strips or cubes. Remember good kitchen safety and once you cut raw chicken with the knife or on the cutting board, don't use them for anything else until they are well cleaned. Oh and wash your hands!! :)

Ok so we have the cut up chicken. Place it in a pan with some oil, I use about 2 TBSP olive oil (a staple in our pantry) and season it with something. We have several choices around here. Here are a few of our usual's in the pictures. One's I usually grab for seasoning chicken is some Mrs. Dash Garlic & Herb or Mc Cormicks Garlic and herb seasoning. Add about a tablespoon or 2 (really I don't measure much in my kitchen I just dump it in!). Not feeling too creative? Just some salt and pepper work great too.
S we got the chicken in the pan with oil and seasoning... Now for cooking it. Turn the burner on med and give it a stir ever few minutes until all the chicken turns white, and the juices run clear.
Here's my end product. If you want to be creative with flavors add some fresh chopped garlic or mushrooms to the pan too.


So now you have some cooked chicken... How about some recipes to go with it!

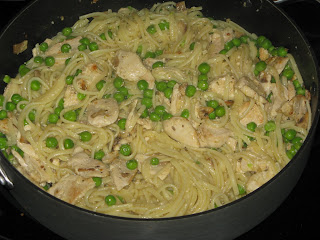
Curly Chicken and Peas
*So this was one I came up with on my own, Bacon Jr. named it if you were wondering!*

2 cups tri-color rotini noodles- (any noodles work just fine)
1/2 pound chicken breast cut up (2 frozen chicken breasts)
2 cups frozen peas
1/2 stick butter
1/4 c. Parmesan cheese
seasoning to taste
2 TBSP oil

In large kettle boil water for noodles. In pan place oil, chicken and seasoning. Cook on med until cooked all the way though, keep on low temp until noodles are done. When water is boiling, add in noodles and frozen peas. Cook until noodles are tender. Once noodles are cooked, drain and mix in pan with chicken. Add butter and cheese and let melt, stirring to mix it all in.
Serve with more Parmesan cheese for topping.


Lemon Garlic chicken

1/2 lb (2 frozen breasts) chicken breasts - cut up
2 cups noodles (we use linguine or bow tie, but be creative, anything works!)
1 cup frozen peas or broccoli
1-2 TBSP oil
Seasoning to taste

Sauce:
1 Stick butter
2 TBSP lemon juice
2 tsp chopped garlic
1/8 cup Parmesan cheese

In boiling water, add noodles and frozen peas or broccoli. Cook until noodles are tender and drain. In pan, saute chicken with oil and seasoning until chicken in cooked all the way though and juices run clear. While those are cooking, in small sauce pan place all ingredients for sauce and let melt on med- low, stirring occasionally. When chicken is done, add cooked noodles and peas to the pan. Pour sauce over top and toss all together. Serve with extra Parmesan cheese.

** Things you can change up. Instead of bottled lemon juice. Fresh squeeze lemons (1 usually is enough) If you have a zester, or small grater, grate some lemon peel into the sauce also. I've also found an Italian 6 cheese blend (shredded) by Sargento that I love to use instead of the Parmesan cheese in the sauce. For the chopped garlic, I don't bother with fresh, I keep a jar of the pre-chopped garlic in my fridge because we use it in a lot of meals.

And after a long hard day (of chasing after the bacon kids), this meal goes very will with a bottle of chilled Chardonnay! :)**


Friday, August 20, 2010

Saving Bacon around the house

I know most of my posts have dealt with food and how to save on your food budget. Food is one of the areas in a budget I think you can cut down the most. Next time your at the supermarket sneak a peek at other people's carts and see what's in them. I find a lot of processed and convenient foods.

But back to some non food ways to save yourself some money around the house. These are just a few tips. Take a walk around your house. How many do you already do?

  • Turn off the lights. Well we've heard that one since we were little but if you have little kids running around like I do, I'm sure you have lights that are left on.

  • Switch your light bulbs. A few years ago Mr. Bacon and I decided to take the plunge and change all our light bulbs to the energy saving bulbs. We were amazed at how much it actually saved us once we switched (average about $20 each electric bill!). The good news about these bulbs is they are not as spendy as they used to be. Even changing out one or two will help.

  • Unplug it! Do you leave that mixer plugged in? How about the coffee pot. If it's not in use, unplug it. It seems like an odd thing to do, but even if your electronics are not being used, if they are plugged in they are using energy.

  • Challenge yourself to use less. Of what you ask? Anything.. shampoo, laundry soap, dish soap, hair gel, shorter shower to use less water, ect. Many times you'll find that you don't notice the difference if you use just a little less.

  • Refill your foam soap pump. This is one of my favorite things to do. Especially with 3 little ones around. Who doesn't like to make bubbles right?! I refill the foam soap containers in our house when they are empty. Fill them 1/4 way with soap, fill the container up the rest of the way with warm water and VIOLA! Foam soap.

  • Temp up, Temp down. Yes it's hot outside, OH how I know it's hot outside. With Bacon bit cooking away inside me I definitely feel the oven heat. However Mr Bacon and I have still agree that we don't need to keep running the A/C on frigid. A few years ago we had our A/C set around 72*. Now we keep it around 74*. Doesn't sound like a big difference right? Well a handy phamplet from our electric company awhile back showed us that every one degree we change (up in summer, down in winter) saves us almost .03 a hour! Ok so lets do the math... .03 x 24 hrs = .72 a day * 30 days = $21.60 a month in savings. Looks a lot better now right! Just think now if you change it by 2 degrees.....

  • Keep the curtains closed on hot sunny days. Again this will help with the the high A/C costs. I've found that investing in some 'black out shades' (I use this term very loosely because instead of spending a lot of money on expensive curtains, I bought black flat sheets from the store and hung them behind my curtains on the windows. An added bonus to this, it keeps the sun out of the kids rooms so they sleep in a bit longer in the morning!) help keep even more of the heat out of the house in the summer time.

  • When cooking and baking, I try to make a few things at the same time. If I know I'm making dinner in the oven, I'll also make some cookies or other dessert in there right before or after. This saves money because you're not turning on and off the oven for just one thing. Also an oven tip in winter, after your done with the oven, leave the door open (Make sure the kids are not around, I usually do this while we sit down to eat dinner together) Take advantage of that extra heat to warm up the room.

So what do you think, would these help you out? Do you already do these?

Thursday, August 12, 2010

You're crazy right? .........Homemade cookies


 Check out the new improved healthy whole wheat chocolate chip cookie recipes that all the Bacon kids approve of!! CLICK here


The other day we were at the store doing shopping and the kids were asking for cookies. Of course it was right as we hit the bakery. Just out of curiosity I checked out the prices that the store wanted for them. I about fell over, $3.99 for 12 'bakery' cookies! Of course I didn't buy them. I told the kids we'd bake up a batch later in the week and that's just what we did. Don't they look yummy? Fresh baked warm gooey chocolate chip cookies. I had to take a picture fast because they just don't last at our house. Our batch of cookies made 4 dozen cookies (That's $16 worth of store bought cookies! Maybe I should get into a new line of work...) And they only took about 30 min from start of mixing to first bite. So you want to whip up a batch today? Here is the recipe.

Chocolate Chip Cookies:

1 cup butter or margarine softened
3/4 cup sugar
3/4 cup brown sugar
1 tsp vanilla extract
2 eggs
2.5 cups flour
1 tsp baking soda
1 tsp salt
1-12 oz package (about 2 cups) chocolate chips
1/2 cup coarse chopped walnuts (optional)

Preheat oven to 375*. Combine butter and sugars in bowl. Mix well. Add in vanilla and eggs and mix until creamy. Mix in flour, baking soda and salt until well combined. Stir in chocolate chips and nuts. Drop by teaspoons full onto ungreased cookie sheets. Bake 9-11 minutes or until edges of cookies are slightly browned. Remove from pan and cool on wire cooling racks.

Some tips I've picked up over the years: I find this goes really fast to mix up in my mixer (i have a kitchenaid mixer but any mixer will work, of course mixing with a good ole' bowl and spoon works just a well) When baking the cookies keep an eye on them, every oven bakes different. Take them out of the oven when the edges are slightly browned not the whole cookie brown to get soft chewy cookies. Remove the cookies from the cookies sheet after 2 or so minutes onto cooling racks. This way the bottoms don't turn hard from continued cooking on the hot pan. Feel free to try being creative to make them to your liking. This batch I made up I added in 1/2 tsp of cinnamon, they were delicious! I also like to change extract flavors, my favorite is almond! You can also omit the nuts, or add different kinds (peanuts, pecans, ect) or try adding M&M or white baking chips (or a mix of several) instead of the chocolate chips. Or press these into a greased 9x13 pan for cookie bars. It's great to have a recipe that you can change up for lots of yummy possibilities!

Now go bake :)

Tuesday, August 10, 2010

Birthday cakes on a budget

Some how I forgot to post about birthday cakes during our mad week of birthdays last month. Better late than never right?!

Got a birthday for someone coming up? How much do you normally spend on a birthday cake? I've been to some pretty crazy parties (full of goodie bags, huge spreads of food, elaborate store bought cakes, ect) But I find a birthday cake is one place I can cut my budget back on. I don't buy overprices cakes from the grocery store or have them specially made. I make the good old homemade kind.

Every year my kids 'request' a type of cake. This year for Bacon Jr's birthday after much debate he decided on wanting a shark cake. So we got researching. Now I'm no where close to being a baker, but I do like to try to be creative. The first thing we do is head over to our favorite search engine and type in "shark cake' and hit images. Bacon Jr scrolled through several pages of pictures until he found one that we both agreed wouldn't be too hard to make or break the bank. Thankfully the one he picked even came with directions on how to make it! The night before his birthday I got busy baking and decorating his cake. He was excited because he even got to stay up and help out a bit. Here's how it turned out!


Not too bad I think! And what really mattered is what HE thought of it and Bacon Jr couldn't have been happier with his cake. I have to say I didn't go full homemade here. I used a box mix (Shhhh.. I know but it wasn't that expensive at .88 a box!) I did however make my own frosting. The finishing touches were marshmallows, a cookie, grape lifesavers and a red fruit roll-up that we had left over in the house.
If you'd like to make your own shark cake the directions can be found HERE

Homemade white frosting:
1 cup shortening (like crisco)
1.5 tsp vanilla extract
1/2 tsp almond, lemon or orange extract
4.5 cups powdered sugar
3-4 TBSP milk

Mix shortening and extracts in bowl with mixer. Mix in 1/2 of the sugar and 2 tbsp milk. Add in rest of sugar and enough milk to desired consistency.

*This will make quite a bit of frosting. You can make your own colors by adding food coloring drops or paste to the mix.*

For Little boy Bacon's birthday cake he wanted Nemo. He's obsessed with fish right now. So once again we hit the computer to take a look at fish cakes. He found one that I thought I could pull off. It wasn't too bad, a plain 9x13 cake and we used recess's pieces & marshmallows to make nemo. Again I used a box mix and this time a tub of frosting I had in the pantry too. And we splurged on the candy for the top, but even with all that, it was still considerably cheaper than buying a store bought cake. Here's our finished cake.


Ok so no matter what I tried I can get the picture to turn the right way, but you get the point!

Are you not so creative with cakes? It's Ok! Making a homemade cake (even from a mix!) is easy and even a few sprinkles can make it look and taste yummy. Another fun thing to do is have your little one help decorate the cake. They can pick out some fun sprinkles or frosting and help decorate it. Take a picture and each year you have a great snap at your child's creative skills with cake decorating and I'm sure they'll remember how much they loved helping make their special cake. So what are your thoughts? Did I get your creative juices running on how to keep some of that cash in your pockets at the next birthday?


Is it REALLY Cheaper? Homemade pizza continued...


About a week ago I was talking to a friend about the homemade frozen pizzas I make. (I happened to make up EIGHT of them that day!) And she asked me the big question "Is it really that much cheaper to make your own vs. buying a frozen pizza?"

So I decided to figure out just how much does cost so you could see for yourself. We do buy a lot of our pizza ingredients at Sam's club in bulk so that does effect the cost of our pizzas too.

I made four 16" supreme pizza's for Mr. Bacon and myself, Here is what I used and the cost:

This is what I prepared for making 4 pizzas
  • Homemade crust- I've figured this out before, it costs about $1.50 to make the crust recipe I posted and I get 2- 16" thin crust pizzas from it. Cost per pizza $.75
  • Canadian bacon (ham bought in bulk at sam's club sold in 4 packs) I use 1/4 a pack on a pizza. Cost per pizza $ .50
  • Italian sausage: $2.50 a pounds- I put 1/4 lb sausage on a pizza. Cost per pizza .63
  • pepperoni (bought in bulk again- $10 for a big bag and I get about 20 pizzas out of it!) Cost per pizza: .50
  • Fresh mushrooms- $1.88 on the container/ 4 pizzas= Cost per pizza: .47
  • Green pepper $1/4 pizza's = Cost per pizza: .25
  • Red pepper$1.75/4 pizza's= Cost per pizza: .44
  • Green olives $1/4 pizza's= Cost per pizza: .25
  • Black olives $1.25/4 pizza's= Cost per pizza: .31
  • Onion (only used 1/2 of the onion I bought for all 4 pizzas) $1.00/2 =.50/ 4 pizzas: Cost per pizza: .13
  • Homemade pizza sauce (I make my own from the tomato's grown in our garden, When I don't have homemade I get about 2 pizza's from a CAN of store bought pizza sauce) Cost of my homemade sauce $1.50/ pint jar. We don't like a ton of sauce on our pizzas so I get 4 pizza's from a jar. Cost per pizza .38
  • Cheese bought in bulk again for $10 a bag, and I get 8 pizza's from each bag- Ok, we like a lot of cheese! Cost per pizza Cost per pizza: $1.25
So lets add them up: Cost per supreme pizza is $5.86 for a 16" pizza. No too bad. Some frozen pizzas are cheaper in the store if you are just looking at cost. But this is for a big 16" pizza vs the 14" pizza's that are average in the store. To me this is the better deal even for a little bit of work.

All loaded up and ready to go in the oven for par-baking

When I make pizza's for the kids the cost is greatly cheaper. They only like sausage and pepperoni on their pizzas so for $3.50. No too bad either. We make 2 big pizza's for dinner at our house and have plenty left over for lunch the next day too.

So the savings is up to you....and who can turn down homemade pizza!

Homemade BUBBLES

With 4 weeks left of our summer vacation, I needed some new tricks to pull out to keep the kids busy. A friend of mine shared this recipe for homemade bubbles that work amazing! And the best part is I have all the ingredients on hand!

Homemade Bubble Recipe

3 cups Water

1 cup dish liquid (I bought a bottle from the dollar store)

1 TBSP sugar

Mix together and you’ve got The BEST Bubbles!!! No searching all over town for Glycerin either. I mixed up a big batch of these and stored them in an empty juice bottle.

Tuesday, August 3, 2010

"Mom, can I have a snack?"

How often do you hear that?! What does your snack shelf look like? One thing you won't find in our shopping cart on grocery day is a lot of processed and prepackaged snacks. Nope, there's no chips, no prepackaged or bakery cookies, candies, or fruit snacks (ok usually it's rare when we do buy these things, but I admit we all get a 'treat' once in a while). Around our house, our snacks are pretty simple or homemade. Today we made peanut butter crispy bars. And they were a huge hit!
We had all the ingredients on hand which made it a bit easier to make ( I will admit, this is one of our more spendy snacks if I had to go buy all these items at once but they taste so YUMMY, the kids have fun helping out and they're still cheaper then buying something similar already made at the store!). This is all we needed. And the kids had fun helping out making them too.

Peanut butter Krispy bars:
1 Cup sugar
1 Cup light corn syrup
1 cup PB
6 cups rice crispy type cereal (or special K or cherrios also work)
1 cup chocolate chips
1 Cup butterscotch chips

Melt sugar and corn syrup in kettle on stove, just until dissolved, take off heat and mix in 1 cup peanut butter. Pour over cereal and mix. Press into a greased 9x13 pan. When Cooled, melt both chips in microwave safe container until melted, spread over top of bars like frosting. Once cool- ENJOY!

Want a treat that's just as yummy but a bit cheaper? How about just some plan rice crispy bars?! For about $2 you can make a whole pan of bars yourself, you'd spend almost twice that buying a little box of 6 pre-wrapped one's in the store.

Rice crispy bar treats

6 cups rice crispy type cereal
1 bag of marshmallows (large or small work)
1/2 stick butter

Melt butter and marshmallows in microwave safe bowl for about 1-2 min until butter is melted, Mix together. Pour over cereal and mix completely. Press into greased 9x13 pan and let cool. Enjoy!

These are great in the summer because I don't have to heat up my oven to make them, helping it stay cooler inside!

But it's not every day we bake some kind of yummy treat. Other snacks in our house include pudding and Jello, but not those store bought, pre-made kind that cost about a buck a 4-pack (you're thinking, but it's ONLY a dollar- it still adds up!) For about .50 a I can buy a box of Jello or pudding mix. And last year I invested in some small containers that work out perfect for the right size snack. These are tupperware snack containers, I bought a big lot (20 of them!) off ebay for a great price. Well worth it, my kids use these all the time.

One box of pudding mix makes up 5 little containers like these. Best thing is the pudding is made with milk, so I know my kids are also getting some much needed calcium too!


Here is a list of some of the other things we have on hand for snack time:
  • Fruit or veggies
  • dry cereal- cherrios are a huge hit with Little Miss Bacon and Little boy Bacon
  • Animal crackers
  • homemade cookies-I get about 3-4 dozen from a batch for less than the bakery price of 12!
  • Yogurt
  • homemade popsicles (from juice, kool-aid, yogurt or pudding)
  • homemade trail mix: peanuts, raisins, a handful of chocolate chips or m&m's. Don't have a nut eater or have small kids, make a trail mix out of cereal instead of the nuts
  • crackers
  • home made chex mix
This is just a short list of some of the snacks we have. By making our own at home instead of buying store bought items, we keep to our budget and save money.